
This is going to be a simple post, basically just a walk-through of the finished product.
Here we’re standing at the door looking forward:
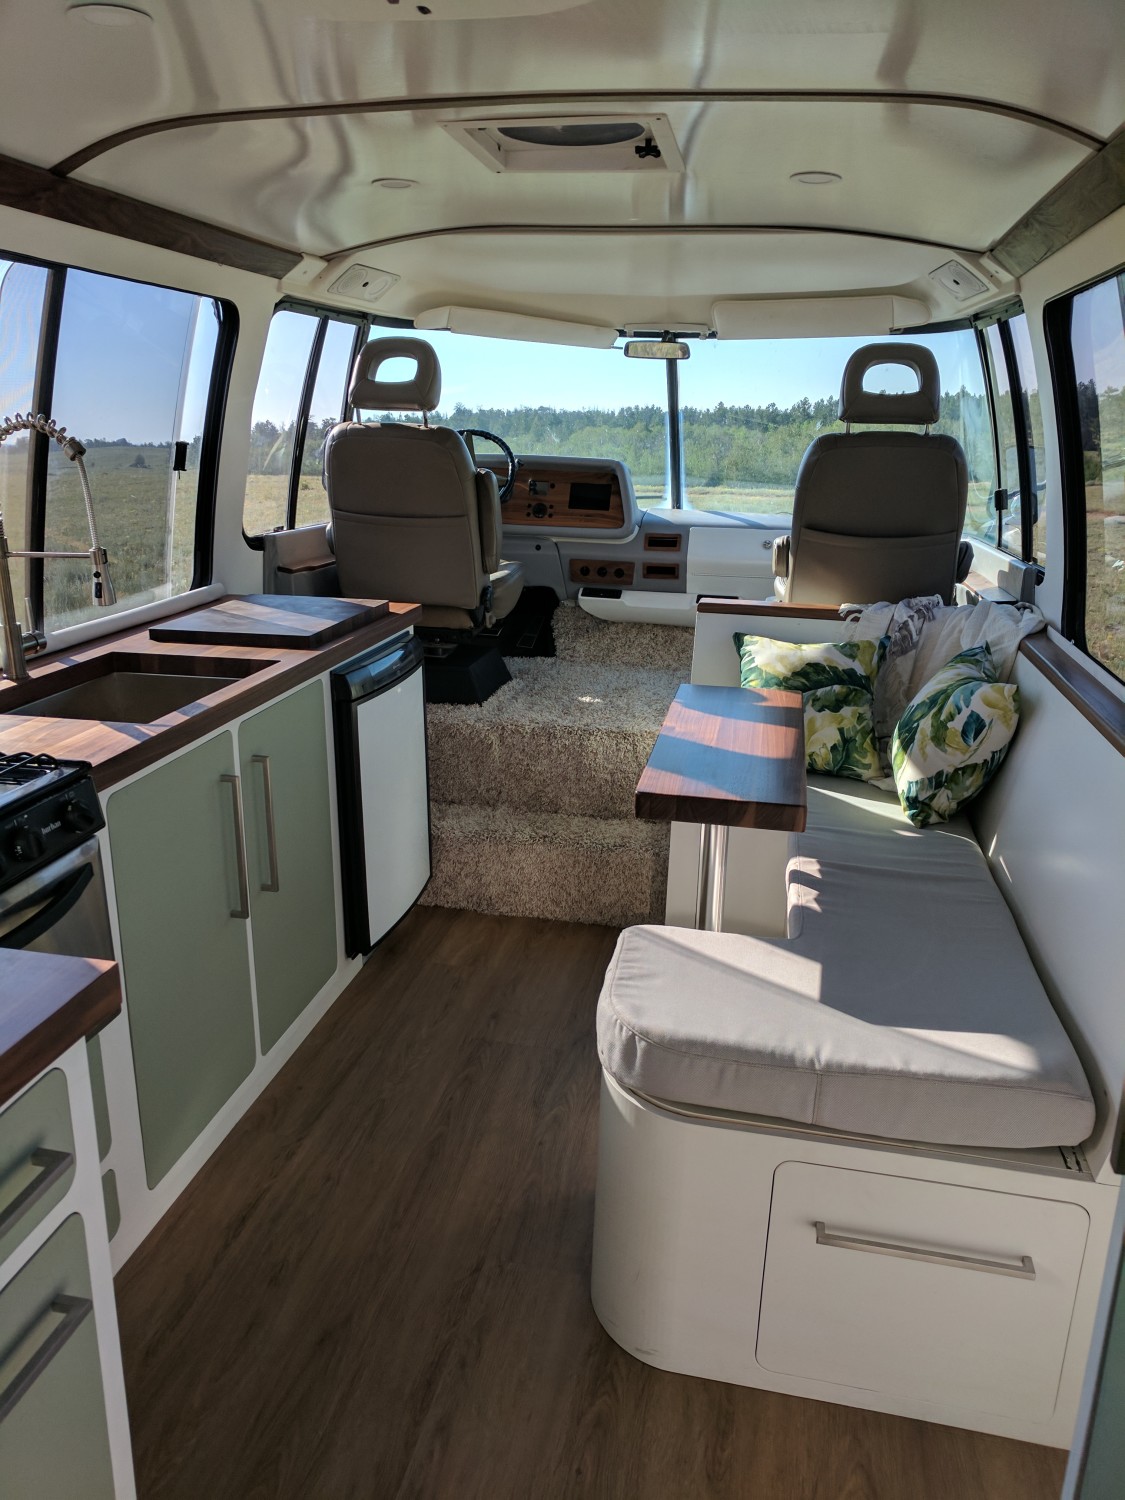
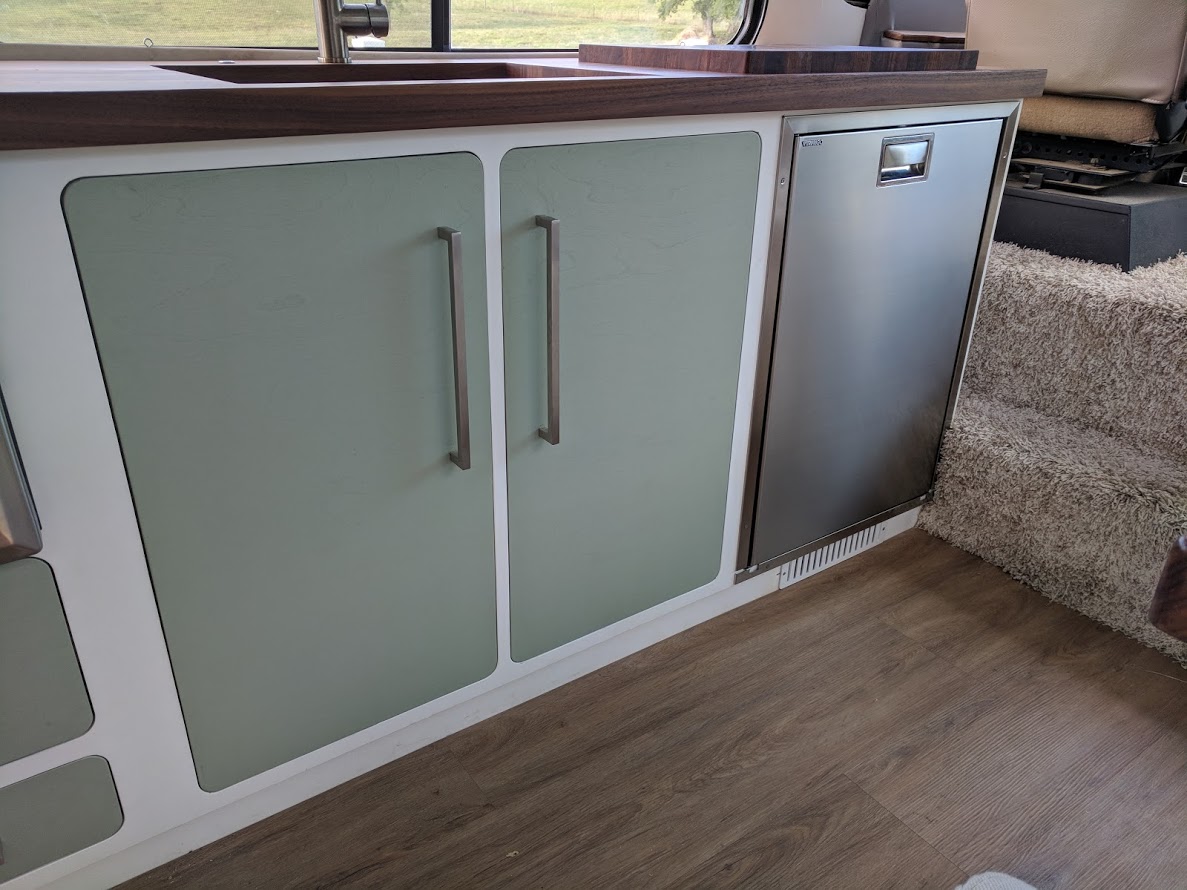
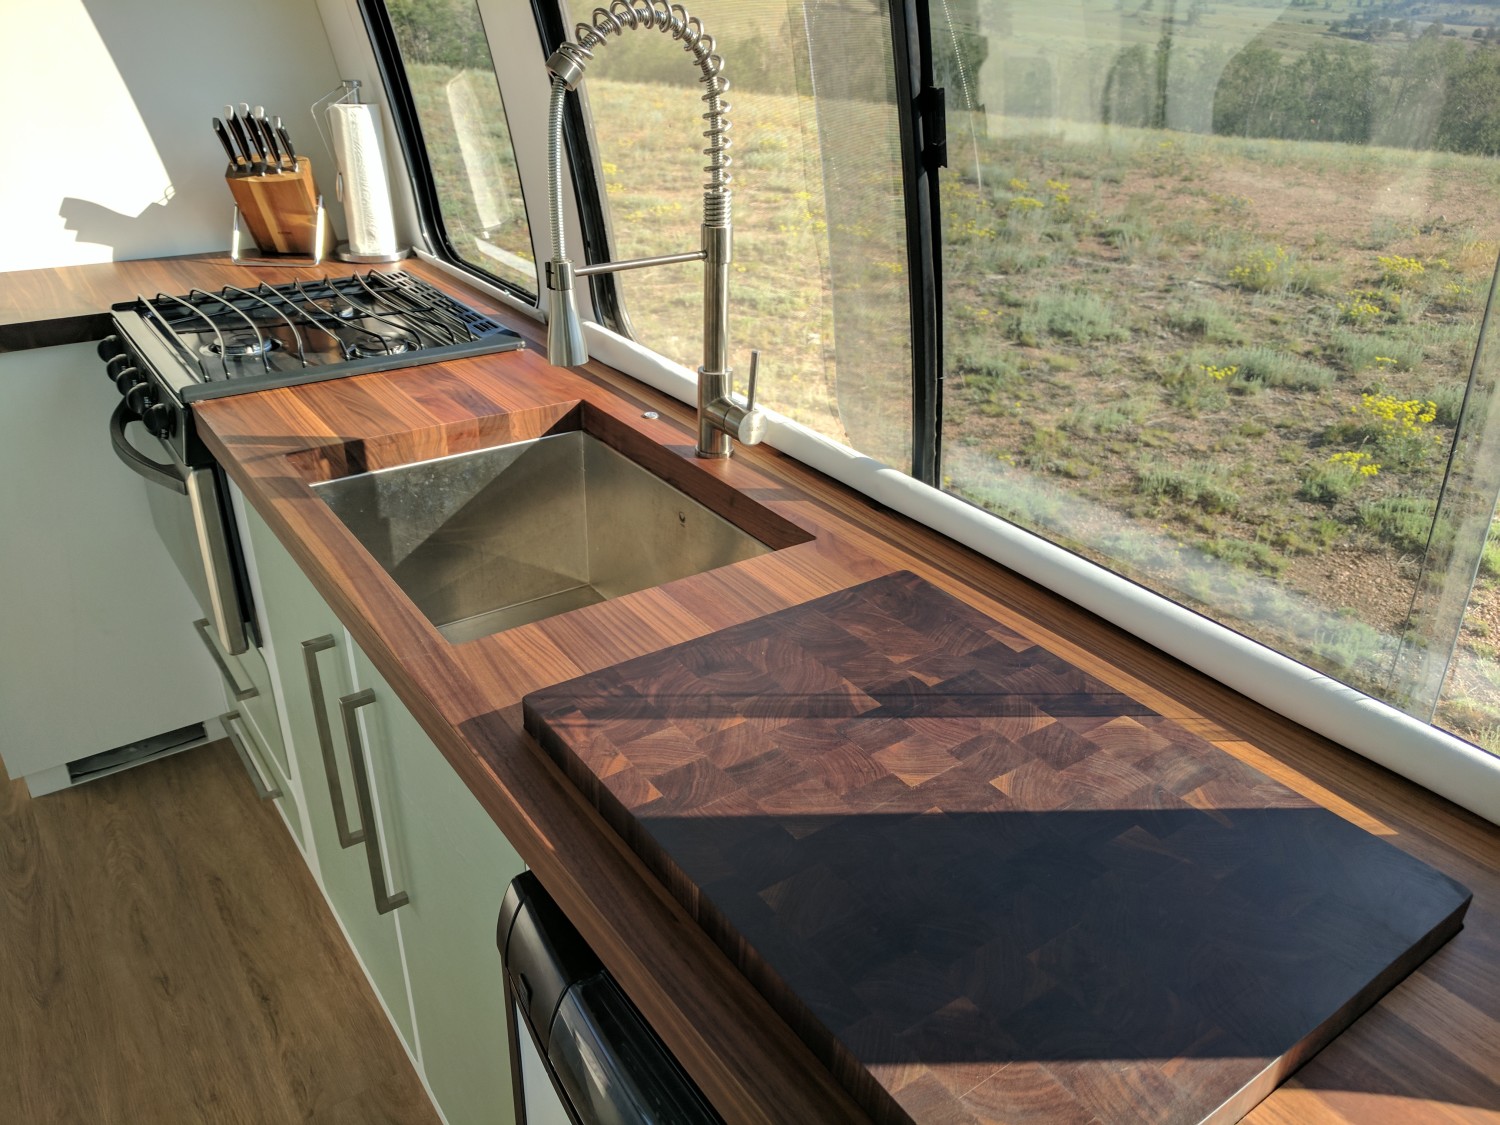
Cabinet spaces and kitchen :
The drawer under the dinette houses a yeti cooler (read beer and ice accessible from outside with the door open)
We’ve since replaced the fridge with a much nicer stainless Vitrifrigo (which we LOVE).
Under the full size sink is the water heater and storage, the dinette also lifts for storage space. We keep all of the tools and spare parts under there normally. To the left of the faucet is the flush mount water pump switch, there’s another on the bathroom wall.
Here’s from the door looking the other direction.
The spice rack in the top right it CNC Cut to hold the jars so they don’t move around while driving.
We love to cook, so spices are necessary enough to build into the design. We also love wine, so of course we had to build in a wine rack!
The sliding bathroom door is Black Walnut and frosted glass, like most everything else in the coach.
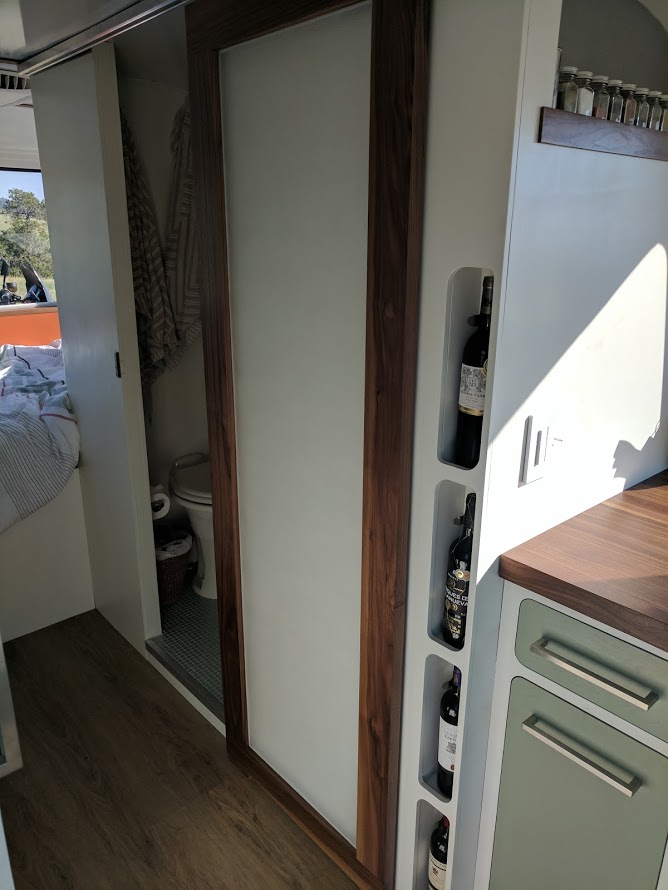
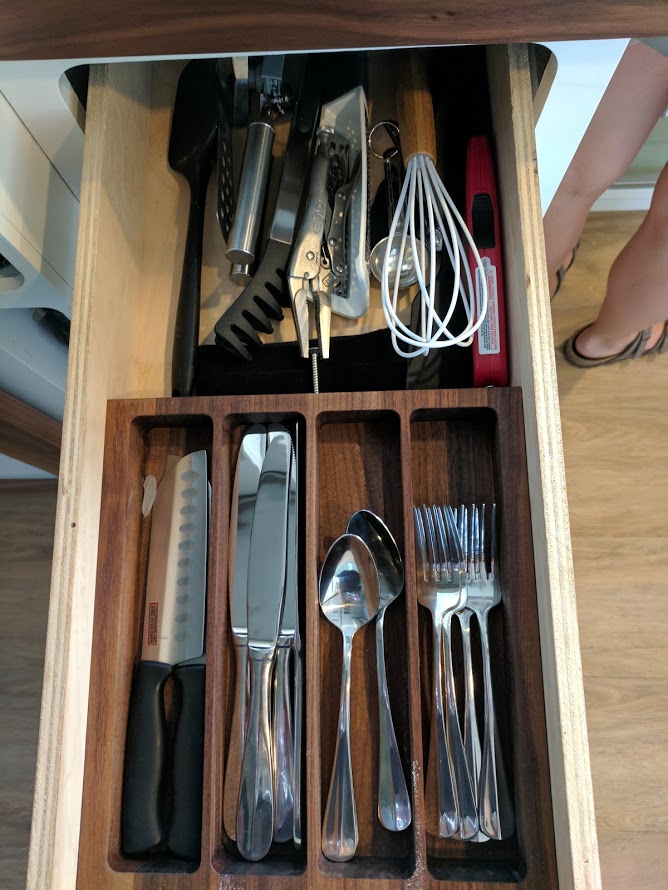
The top drawer is ~36″ deep and holds all of our utensils
Below that the large cabinet slides out and is a trash can.
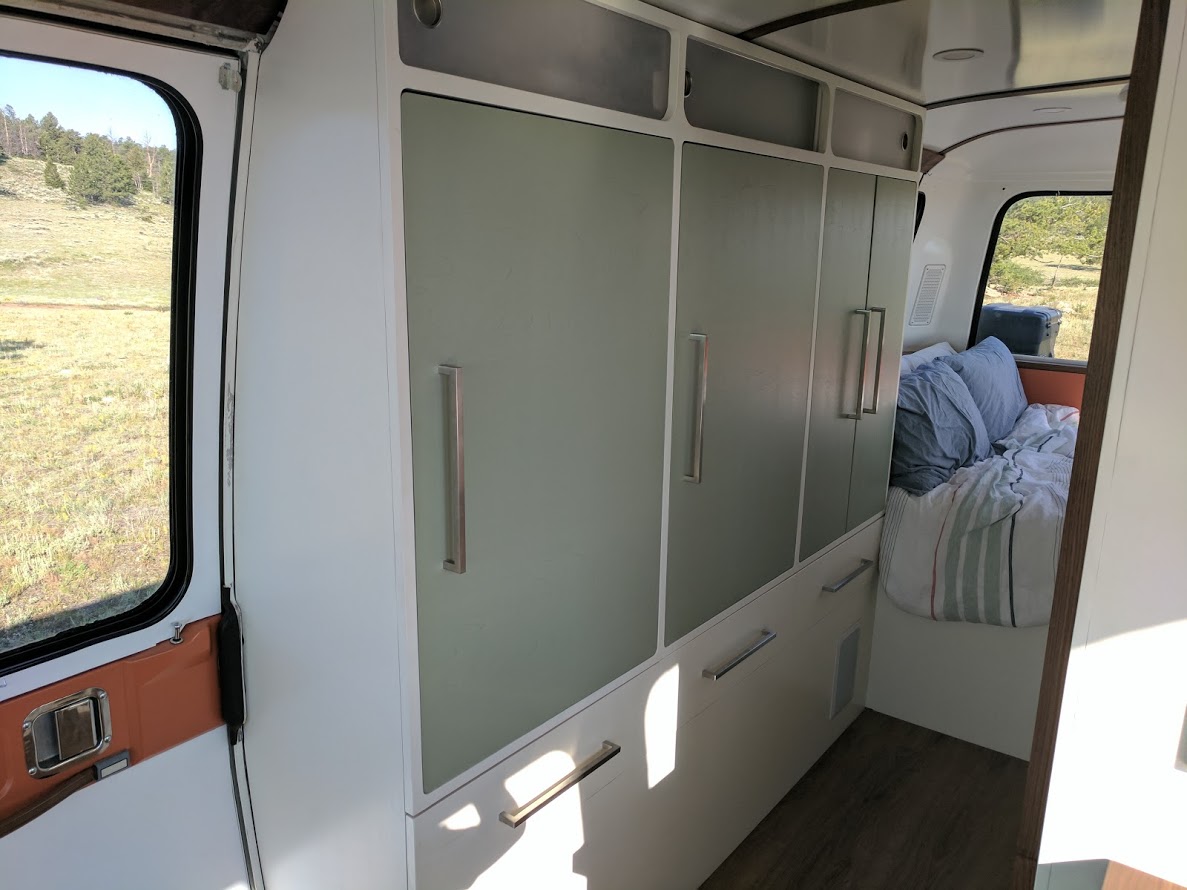
Here are the side cabinets, virtually all of our storage.
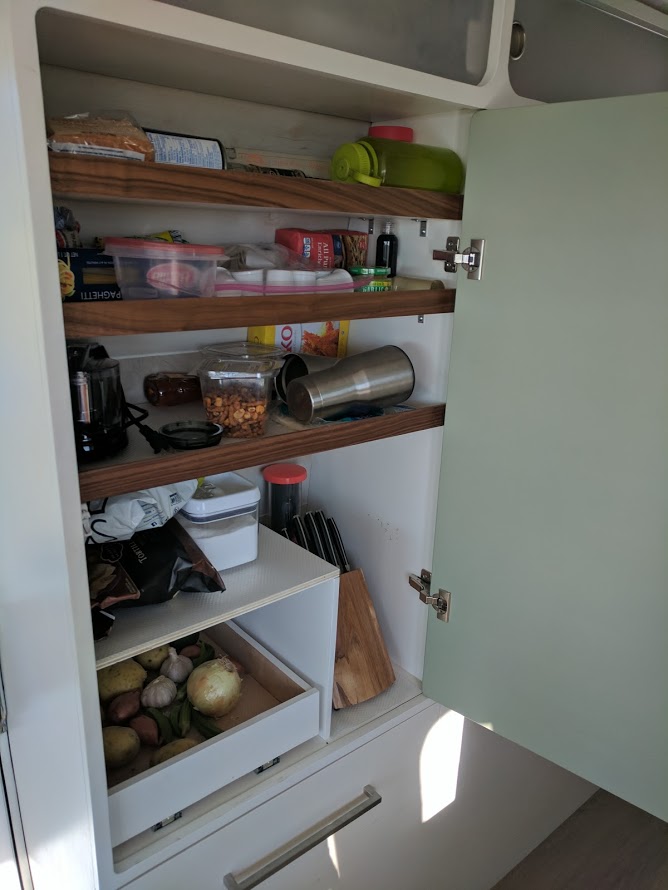
The right most door houses the electrical panel, then shoe storage, then clothes in the middle and pantry on the left.
The right most drawer is clothes, middle is misc junk, and left is dishes. Below that are in-wall speakers. (Can’t live without good music!) Behind the glass sliders is just random junk storage, extra toilet paper, lanterns, etc etc.
The Pantry:
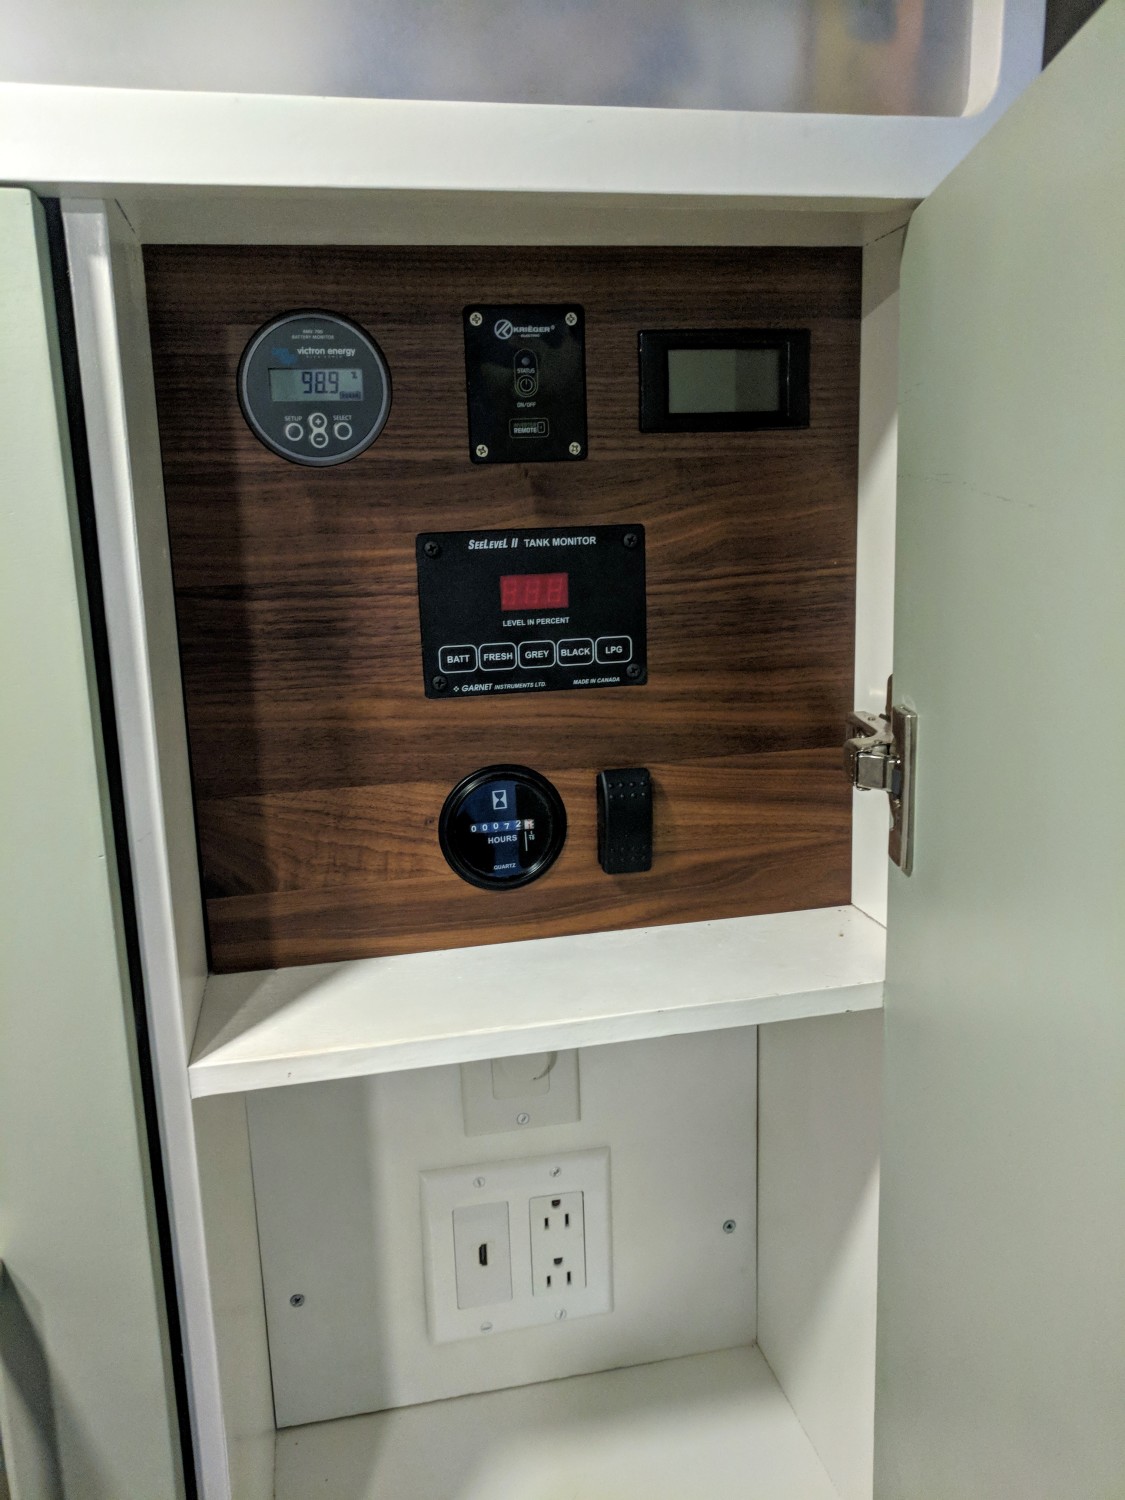
Electrical Hub:
Victron Battery monitor (must have)
Inverter switch
Shore Power Voltage Readout
See-level tank level indicator
Generator switch and Hour Meter.
Below compartment has a master volume control for the stereo as well as an HDMI plug for the TV (we usually keep a Fire Stick or Apple TV plugged in)
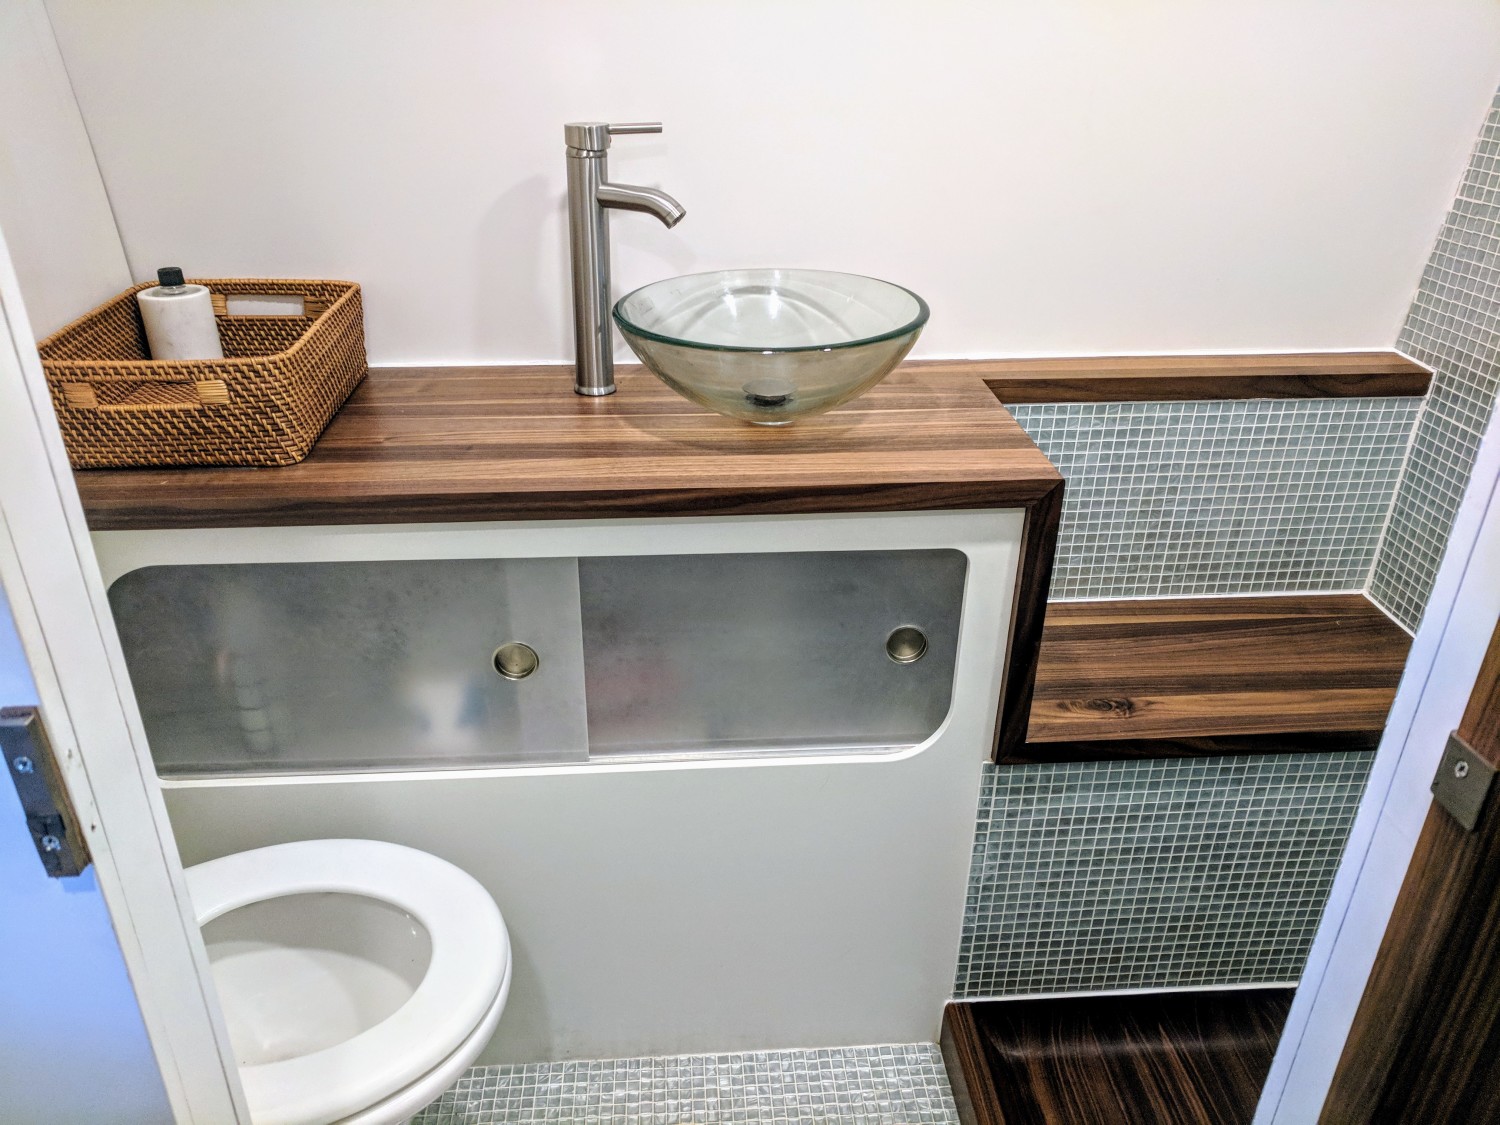
The Bathroom:

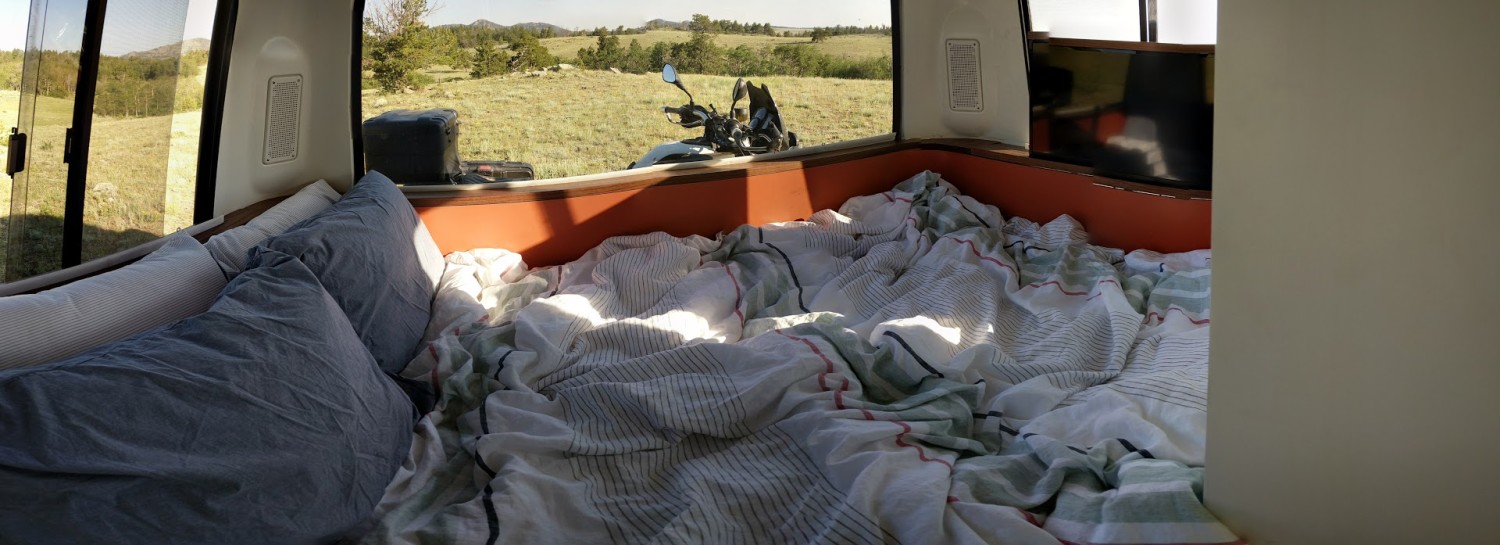
And finally the bedroom area:
The TV recesses into the footboard for travel.
Slick…nice job.
Sublime! Your carpentry work is amazing. Love the countertops, shower pan, and cutting board.
Space being at such a premium in order to pull off a nicely flowing, useful interior layout in a GMC, I’m curious what occupies the space directly behind the wine storage, below the spice rack, between the shower and the kitchen cabinets. Plumbing? Where is the shower head? Very nice work, regardless but that jumped out at me, I know its not dead space. Having gone through planning out an extensive interior reno myself I know space like that serves a purpose, just don’t know what it might be.
Yep plumbing. The wine rack came about because the shower mixing valve is quite deep, so we wanted to make use of that space somehow. There’s all the plumbing for the shower, the wire transition from the ceiling into the cabinetry, and some unavoidable dead space.
we could have put drawers behind the wine racks, but honestly we have too much storage already so we were ok with losing the couple of cubic feet in there.
Clean beautiful comfortable if you want privacy can you have it?
Hey Maureen,
It’s not readily visible in the photos but every window has a blind built into the area underneath it. They pull up and hook up top. I’ll try to get some photos of that later today.
Looking forward to all photos. Thank you.
I hate, Hate, HATE, fabric curtains or blinds hanging everywhere. I don’t even have them in my house. I LOVE that the blinds store down and you pull them up to use them. Did you build a void behind the cabinets for them to roll down into? Where do they hide? The whole design is fantastic, but the thing that jumps out at me is windows and nothing hanging, dangling, rocking, on the ceiling and walls ruining the clean lines of many nice headliners, walls, upholstery, and floors. This is stunningly clean and shows just how amazing the windows in this coach are. Are these the original windows or did you change them out as well? I’ve actually never seen the windows so clearly before because of all the window treatments most people have. This is just fantastic and absolutely inspiring.
Thanks Shawn, sorry for the delay here, I’ve got to wade through spam comments to find the real ones.
You’re correct there are voids under the countertops behind the cabinets that the roller blinds roll into.
Original windows, it blows my mind that GMC build these things with these massive windows, only to cover 40% of them up with upper cabinets, why bother with the windows if you can’t see out of them!?
What a stunning result.
Regarding the blinds, is this a special type of blind or is it just regular rolling type window shades mounted at the bottom?
Thanks for sharing the results of all your work!
Hey Peter,
They are normal roller blinds with the ratchet mechanism removed. The only issue we’ve had is they tend to get dirty which is annoying on a white blind!
Hi! So happy to see an update 🙂 How is the tile holding up in the bathroom? Did you use a flexible grout? I think your coach is classy and gorgeous. I super love your kitchen sink. Did you go with an on demand water heater?
We’ve had a few pop out here and there but overall very well. When they pop out I just epoxy the back on. Grout is still perfect.
Yes we used a flexible grout, can’t remember the name brand.
Yep, on demand water heater, https://www.amazon.com/Girard-2GWHAM-Demand-Tankless-Heater/dp/B019BWN8E2
Second to mine, only because I have to love mine best..I love, love, love what you did..
Justin, very good job done!
We should revive GMC as JMC, making you the chef designer, builder and salesman …
Hope to see your coach, in the real. Hopefully you visit Tallahassee GMCMI and we can come too, in our Flying Dutchman 🤗🇳🇱🇺🇸👋
Spectacular design and execution!
Can you share the plans
I don’t have any real layouts. We had several but they all went out the window once we got into the build and into the space!
You guys did an amazing job…. I’m wondering what you used for the ceiling panels? I’m about to do mine… So looking at options…
Thanks again, for posting this…
Steve
Thanks Steve,
The ceiling is Aluminum. It’s bought in 4×8 sheets and is the same stuff they use to build the sides of enclosed trailers.
The best GMC I have ever seen. I am almost glad to have delayed my project until I have seen yours. May I ask about your aluminum panels. What gauge did you use, does it have a backing and how is It fastened? Did you use aluminum for side panels at all?
Hey Alan,
Thanks! The aluminum is 22 gauge I believe, it’s standard for enclosed trailer sides.
No backing, a foam or felt backing wouldn’t be a bad idea.
It’s not fastened, just a nice tight fit into the ceiling channels and then held up again by tension with the walnut strips up front. You could put some screws or rivets under the wood strips if wanted, we haven’t had any issues with it though.
Absolutely stunning. Congratulations, I’m floored by both your skill and your design sense, it’s perfection.
Thanks Tom!
Hello Justin,
Very, very nice job. I am working on a 1979 Airstream Excella motorhome and I got some very good tips from your website. Would you mind telling us which Vitrifrigo did you buy and why?
Best regards,
Carl
Hey Carl,
Thanks! Good to see it’s not only the GMC folks that make it over here!
We went with the C115IXD4-F-1 , because it’s the same size as the dometic we had before, and it has a nice looking surround.
I had originally ordered a DE0788B Norcold, but it doesn’t have any trim and just looks like a dorm fridge in the cabinet.
I couldn’t be more happy with the Vitrifrigo, it looks incredibly nice, and cools almost instantly. It makes me wonder why on earth anyone still has an absorption fridge (it’s just that much better).
I doubled my battery capacity at the same time to make up for the additional draw of the fridge.
Hello Justin,
Thank you very much for answering my question. Your comments are of big help in shaping my choices. Thanks!
Hello Justin,
Ive just purchased a 1976 Eleganza II. Your site has been a great inspiration for ideas. We will be starting a full restoration this winter. Would you mind telling us where captains chairs came from.
Regards
Eric
The captains chairs came with our coach, but I believe they are Honda Odyssey Captains chairs from the middle row.
They are fantastic, better than any of my other vehicles for long haul.
I plan to air condition the seats and have them reupholstered at some point but for now they are great.
2005-2010 Honda Odyssey seats would work and have been used by many, but based on the headrests, recline mechanism, and the stitching, my guess would be 1997-2003 Pontiac Montana seats. I’ve owned both minivans at various times and both are comfortable. 1996+ Astro/Safari LT seats are another good choice.
Wow! Very nice. I’ve been travelin down the GMC redux rabbit hole for a coupla months and yers is a top three. I would love to steal all yer ideas but my/our interior needs are different. Still, at the risk of being to vague, if you’d like to share what you’ve learned – if anything – since completion and quantified usage, I’d love to know about it.
Thx,
Safe and happy travels
Justin – great job wow. Would you be willing to share the cad files for the shelving/storage/cabinets???
Hey Joseph,
Unfortunately the cad files were lost when a thumb drive decided to go corrupt on me.
Yours is the best looking GMC renovation I have seen. You really evoke the classic style and colors, but its all modernized. Great job!
My husband and I are GMC reno envy. We are using the SIP time to work on ours. We don’t want to remove all of the subflooring as a lot of it is ok. I noticed you said you used polysheeting and the 3/4 marine grade plywood on top.So, is it the polysheeting that directly faces the street? Did you attach it to the aluminum strips that lay width-wise on the floor and then the plywd went on top of that? Or did you “rabbit” in the polysheeting?
http://www.thegmcrv.com/wp-content/uploads/2015/12/1-14.jpg
Later coaches had the aluminum sheet on the road side.
Mine goes: Aluminum sheet, 2″ poly insulation, 3/4 marine ply. No bonding between pieces as they are all nicely sandwiched in there. See above link for an image.
Just saw the Dwell article and found my way here. Amazing work on this renovation! We are inspired to do something similar. Do you still have the GMC or did you sell it?
Thanks,
We’ve still got it and have no plans to ever sell it!
I’m wondering if I missed it in the comments, but what kind of wood did you guys use in the bathroom? We’re redoing the bathroom in our camper and I LOVE, LOVE, LOVE this.
Everything in the coach is Black Walnut including the bathroom, thanks!
Beautiful interior.
Would you be interested in selling this by any strange chance?
Nope no plans to sell!