
Where’s the storage space?
Storage is a huge deal in an RV as I’m sure you’re already aware! We need space for everything you normally need like clothes and food, but also additional space for tools, camp chairs, a table, hiking boots, spare parts, motorcycle gear, rain gear, etc etc. With this in mind we set about designing our cabinetry.
We wanted something different, something sleek and modern, but with a 70’s vibe to pay homage to the vehicle they were going in. We also wanted no overheads (GASP!). Overheads are a staple of RV design, they are in every RV I’ve ever been in. The problem is that they really encroach on the visual space of a small enclosed area. They are right up there level with your face, and make a space feel much much tighter and smaller than it actually is. We have essentially 8′ x 23′ to work with, it need to feel as large as possible!
I can’t say enough for visual impression and overall feel. The moment you walk into a space you are bombarded with all of the sensory input that makes your decision on whether a space feels good or bad. We were very careful through the whole build to take this into consideration and the outcome has a distinctly awesome feel when you walk in the door!
After a LOT of time talking and staring at the computer screen this is what we came up with.
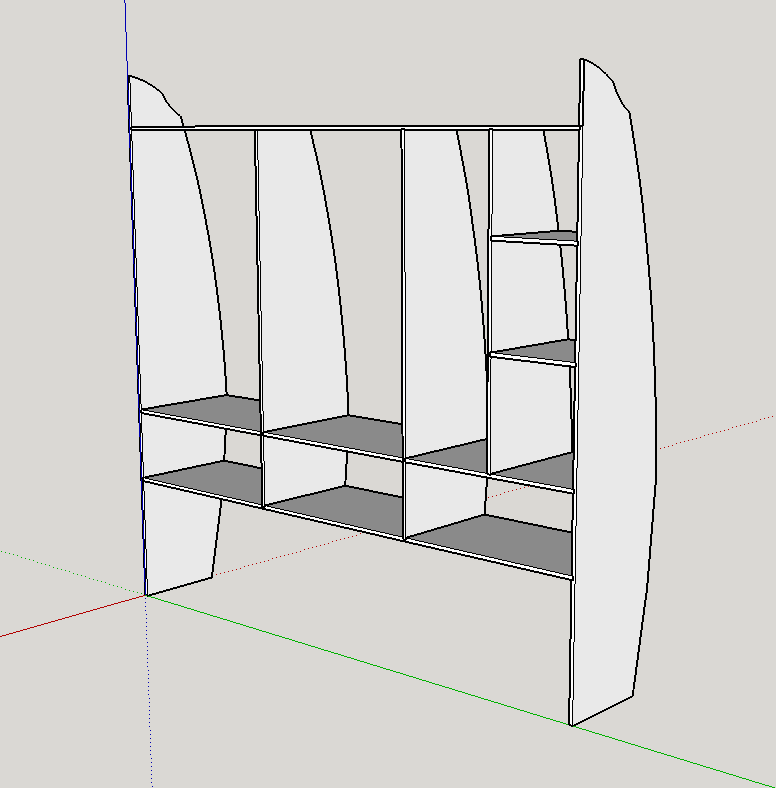
That;s the basic layout for the passenger side cabinets.
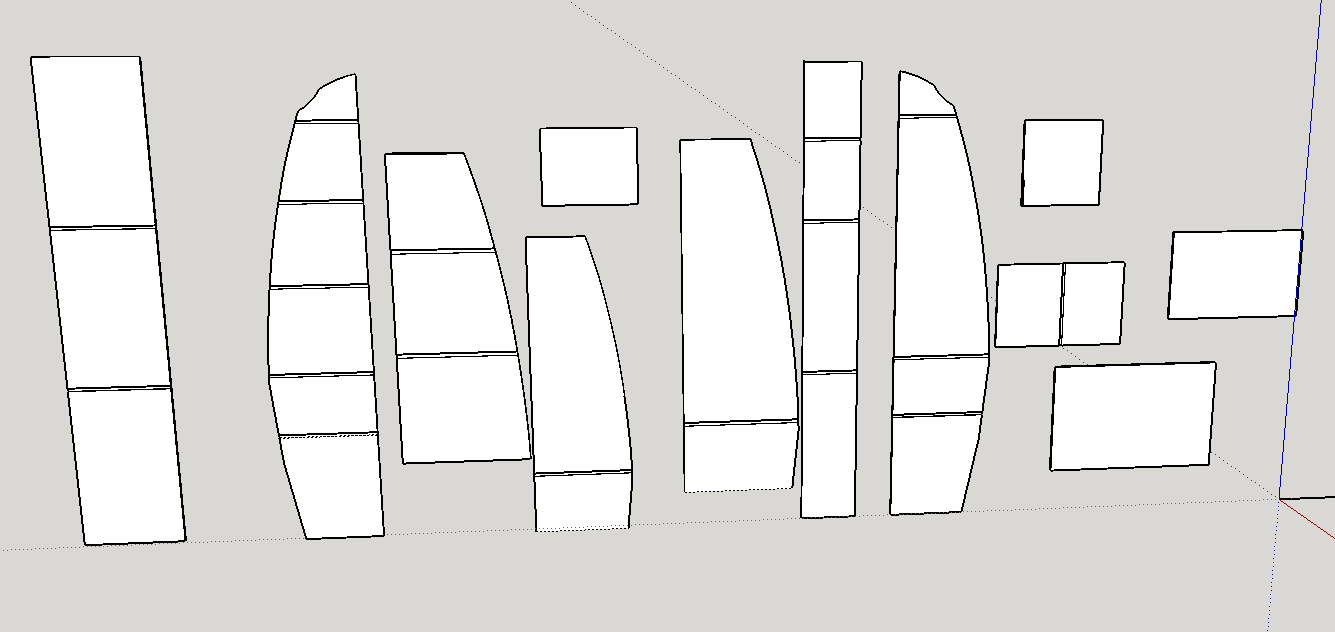
After that mockup, we transferred it over to real CAD (from sketchup) and then tossed it on the CNC to get cutting. (Okay it’s not nearly that simple, but we’re going to go with that)
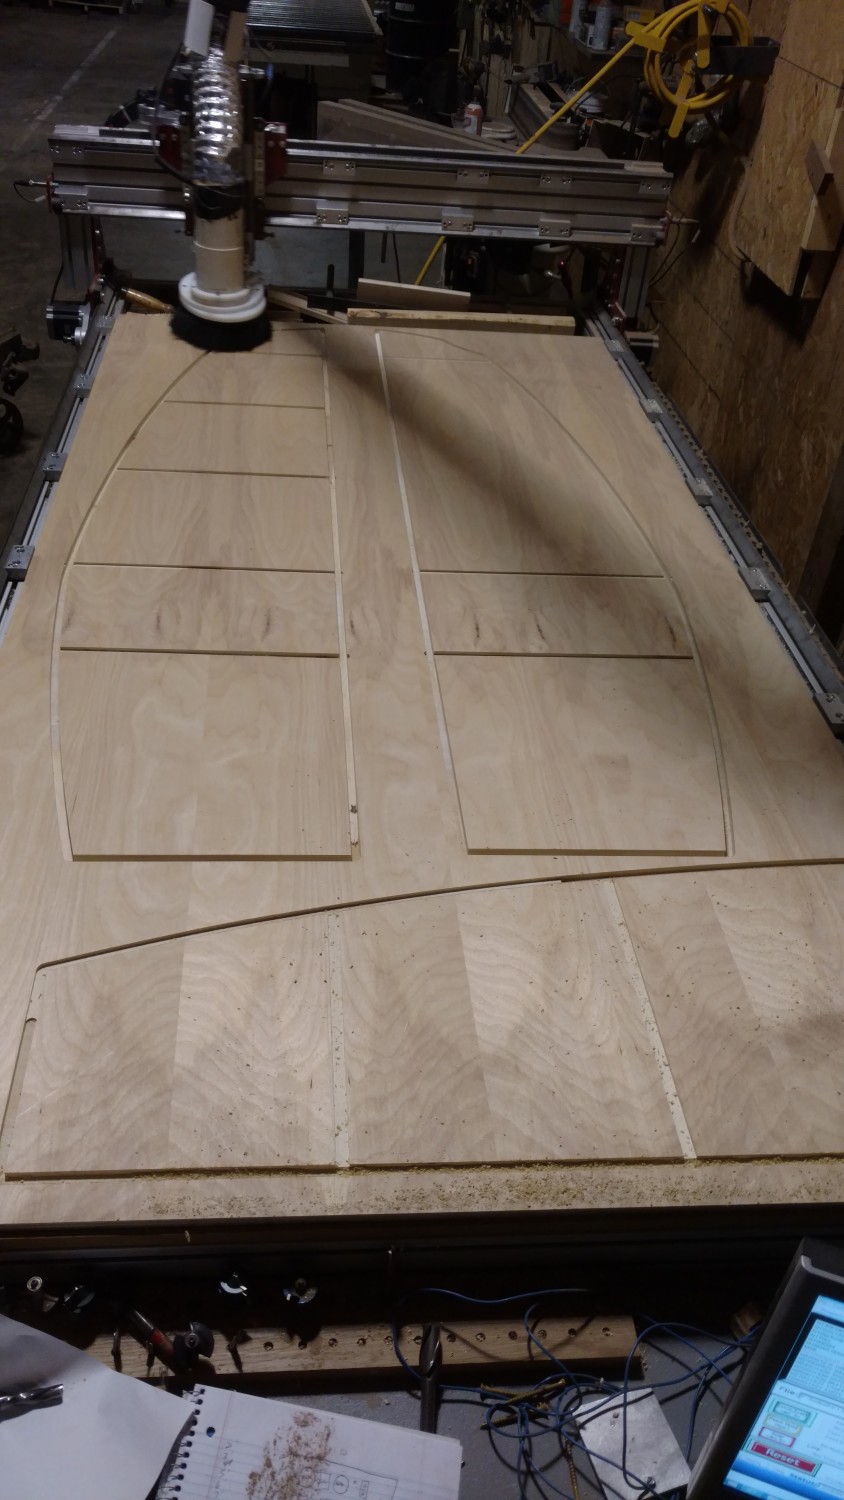
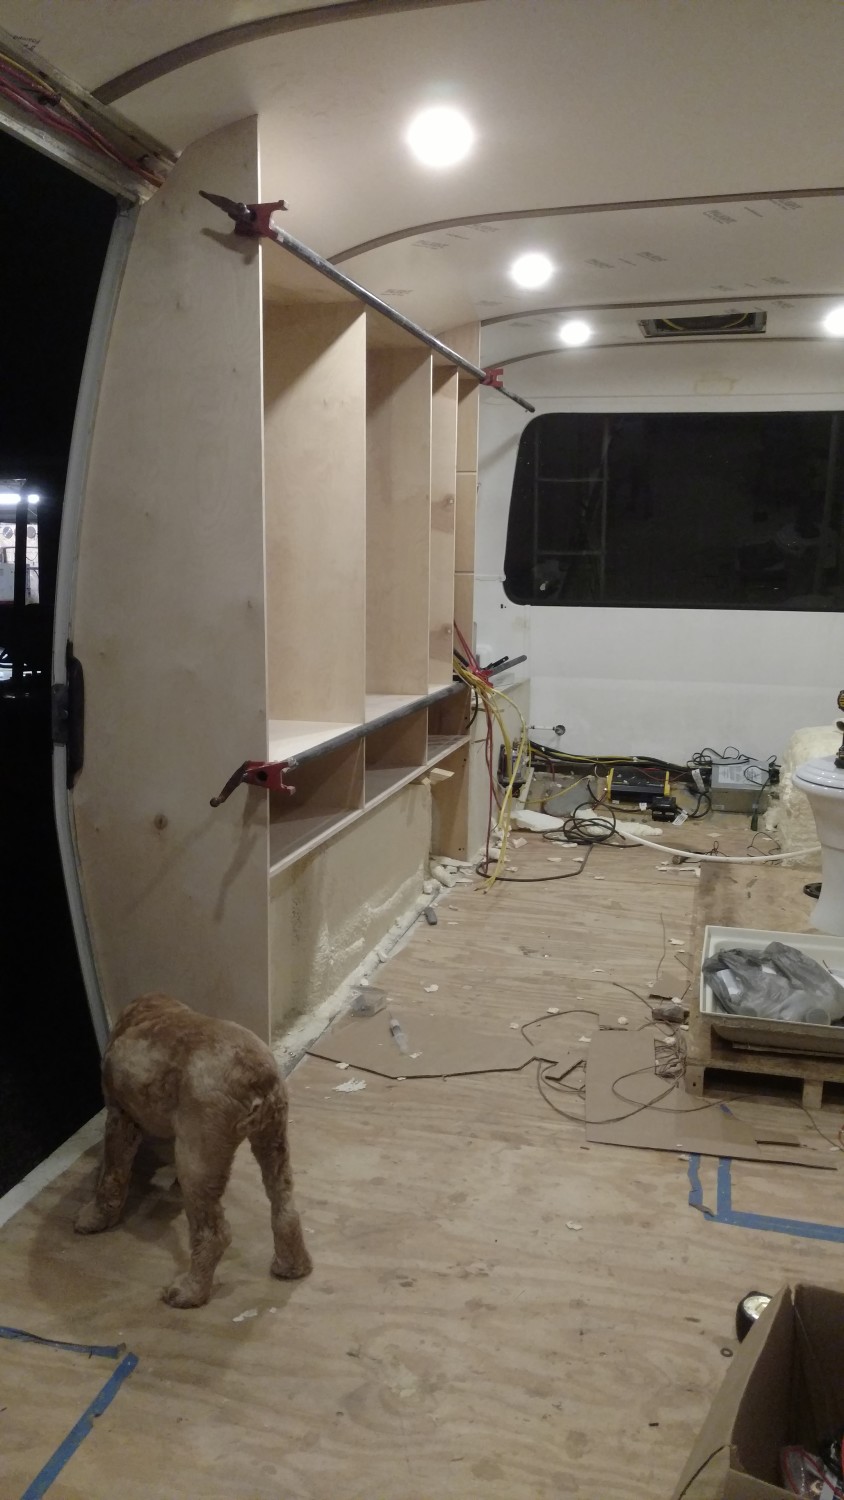
Once it was cut, a little glue, a little clamp time and assembly.
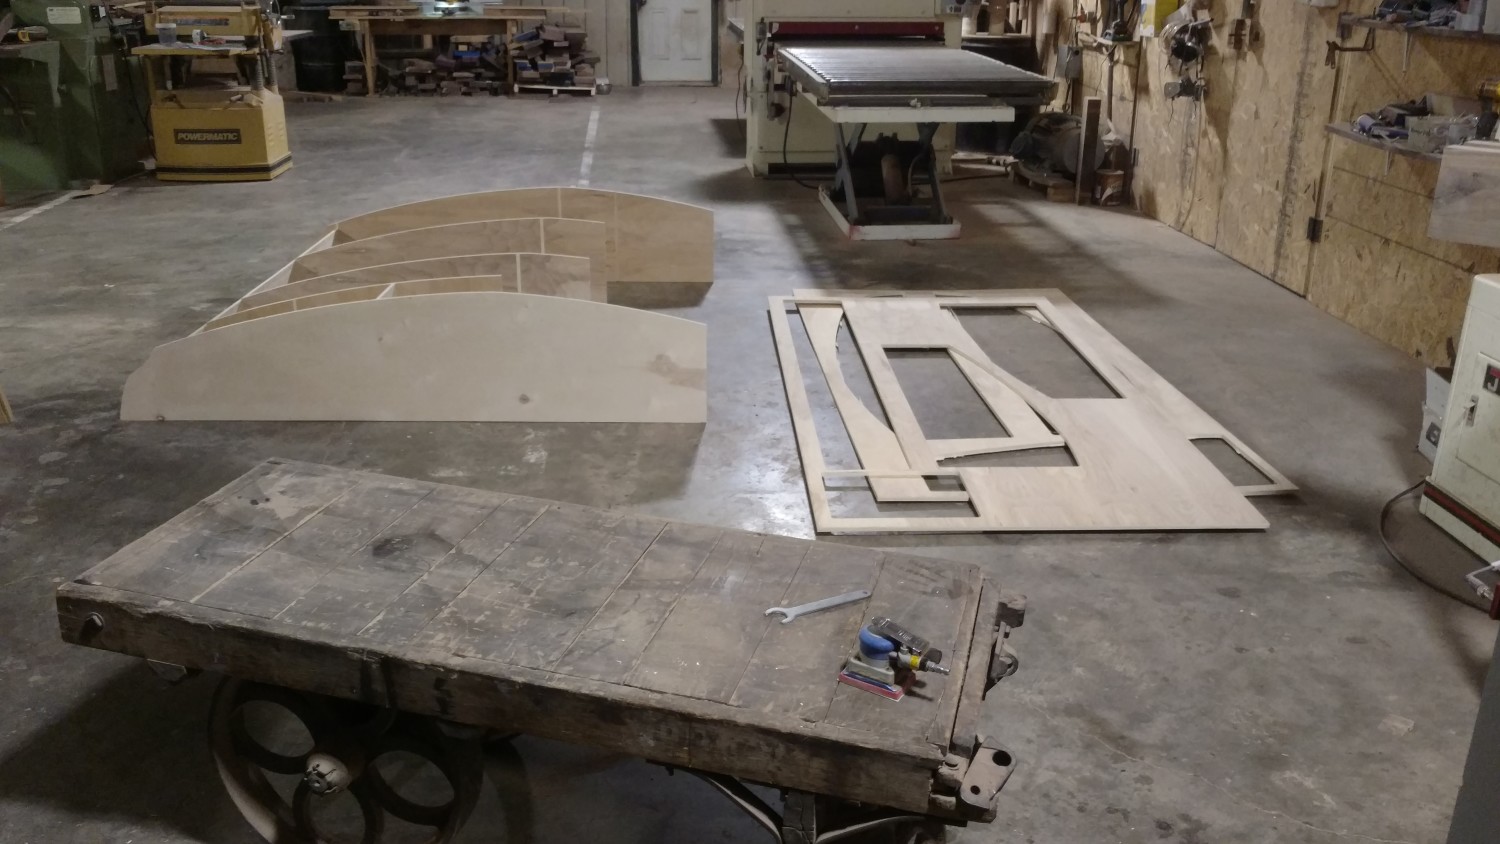
All of the plywood we used was Garnica Lightweight Euro-Ply. It’s great at less than 40lbs per sheet it’s a huge weight savings overall as we used 20+ sheets total.
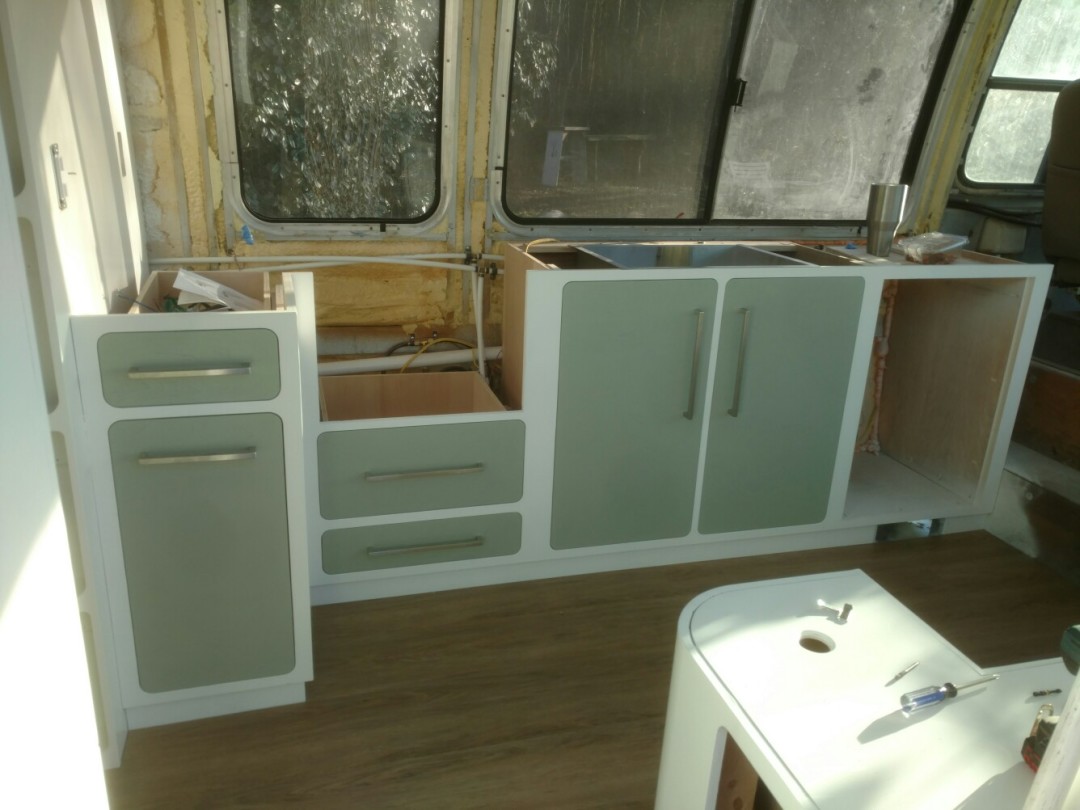
For the faces, we again wanted to do something interesting. So we decided to make the entire face of this cabinet out of 1 piece of ply. Using a very small router bit we cut the cabinet doors out of the face and veneered the edges. This means that the grain flows continuously on the whole face. A very cool look once it was all painted up!
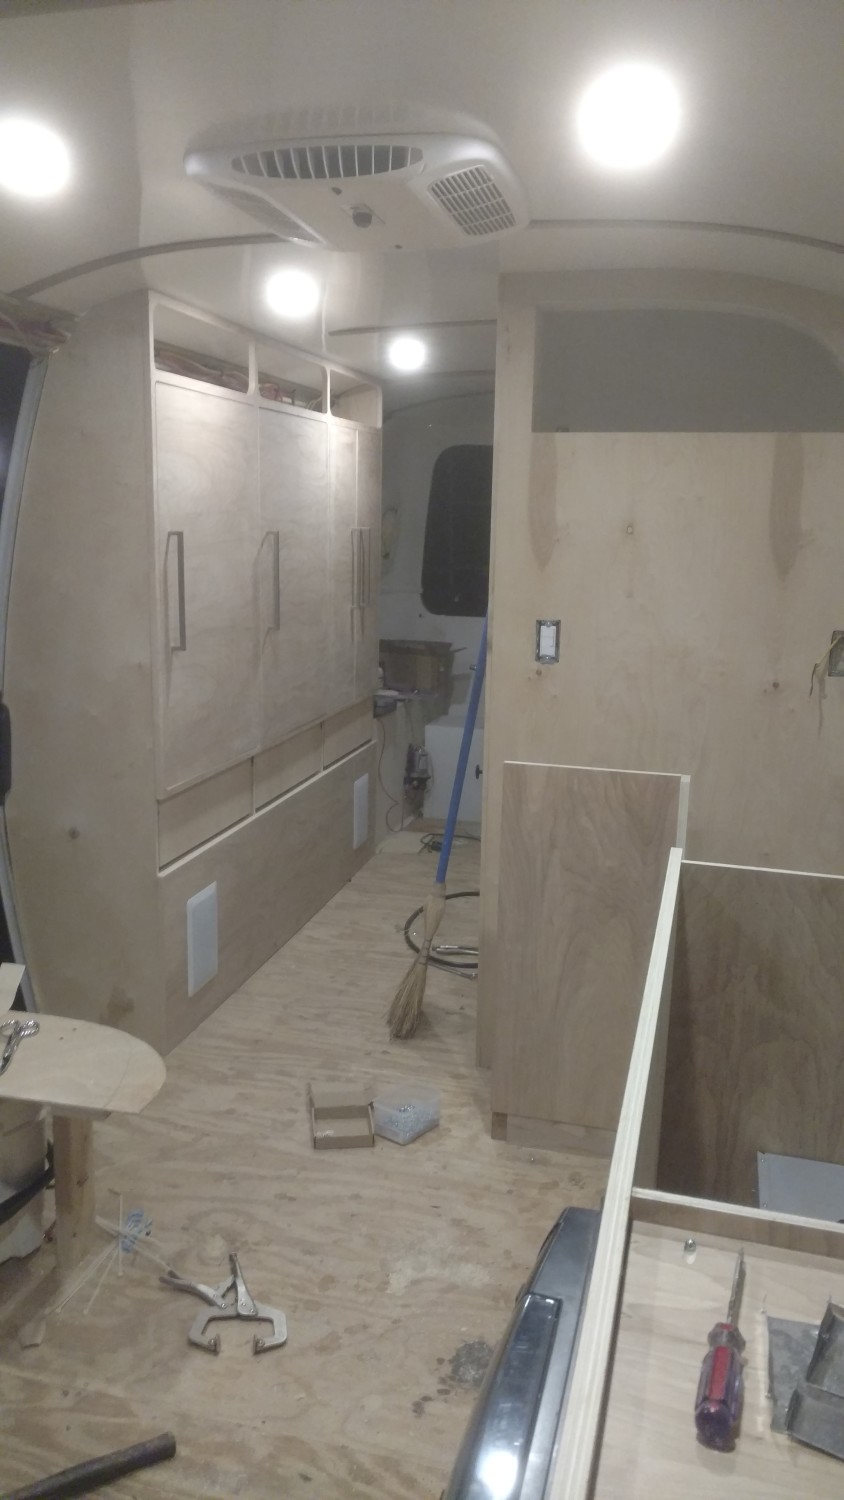
The rest of the cabinetry was done in a similar fashion. Pocket screws were used so that there is not one single visible fastener in the coach.
For the Dinette, we decided against a traditional dinette. It takes up too much room for one use only, it’s not comfortable to sit at when you’re not eating and you can’t just lounge there.
So we came up with something different.
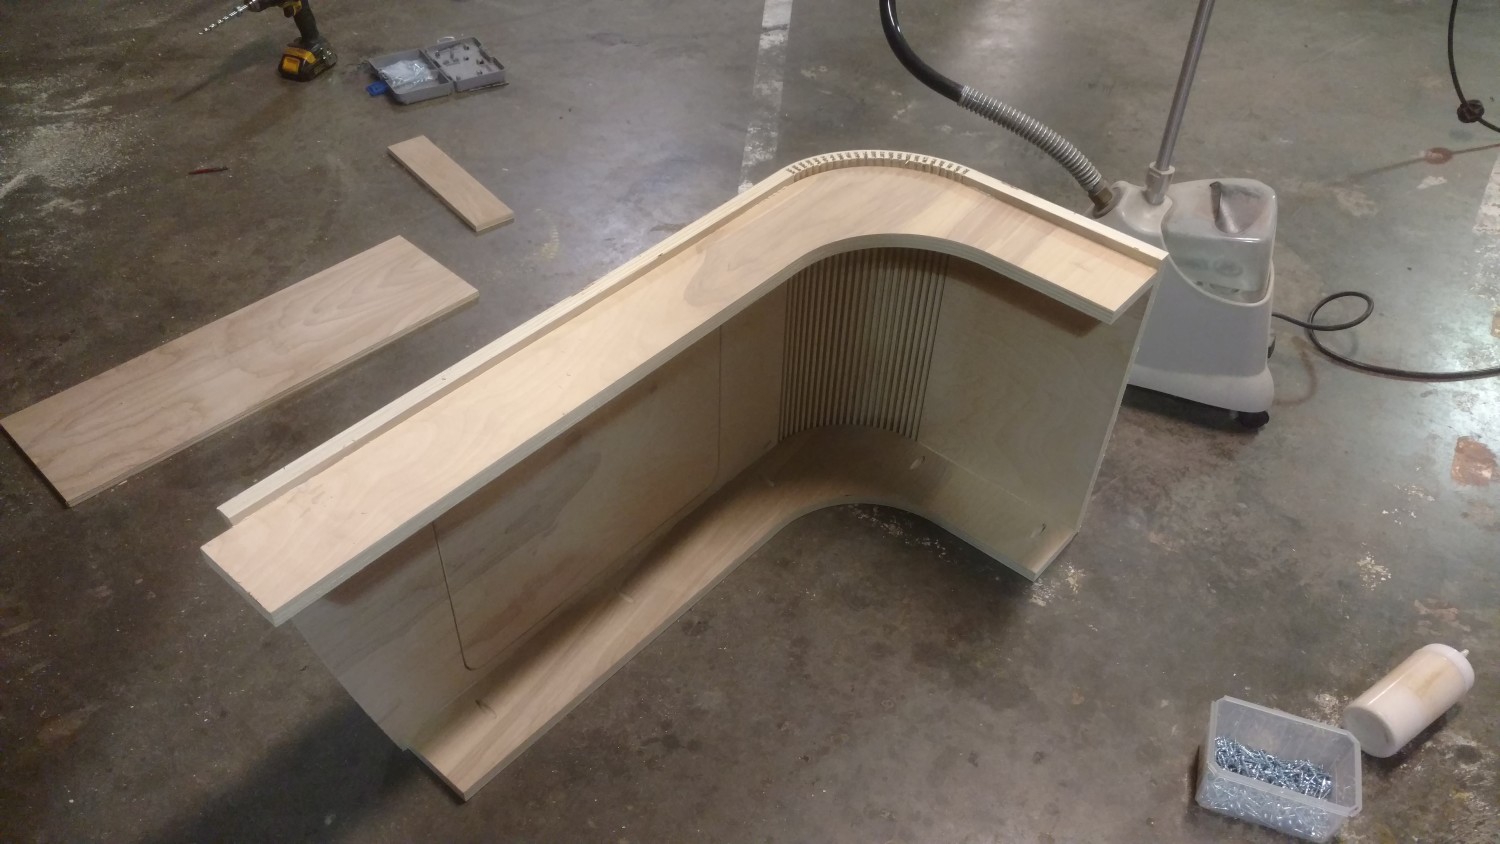
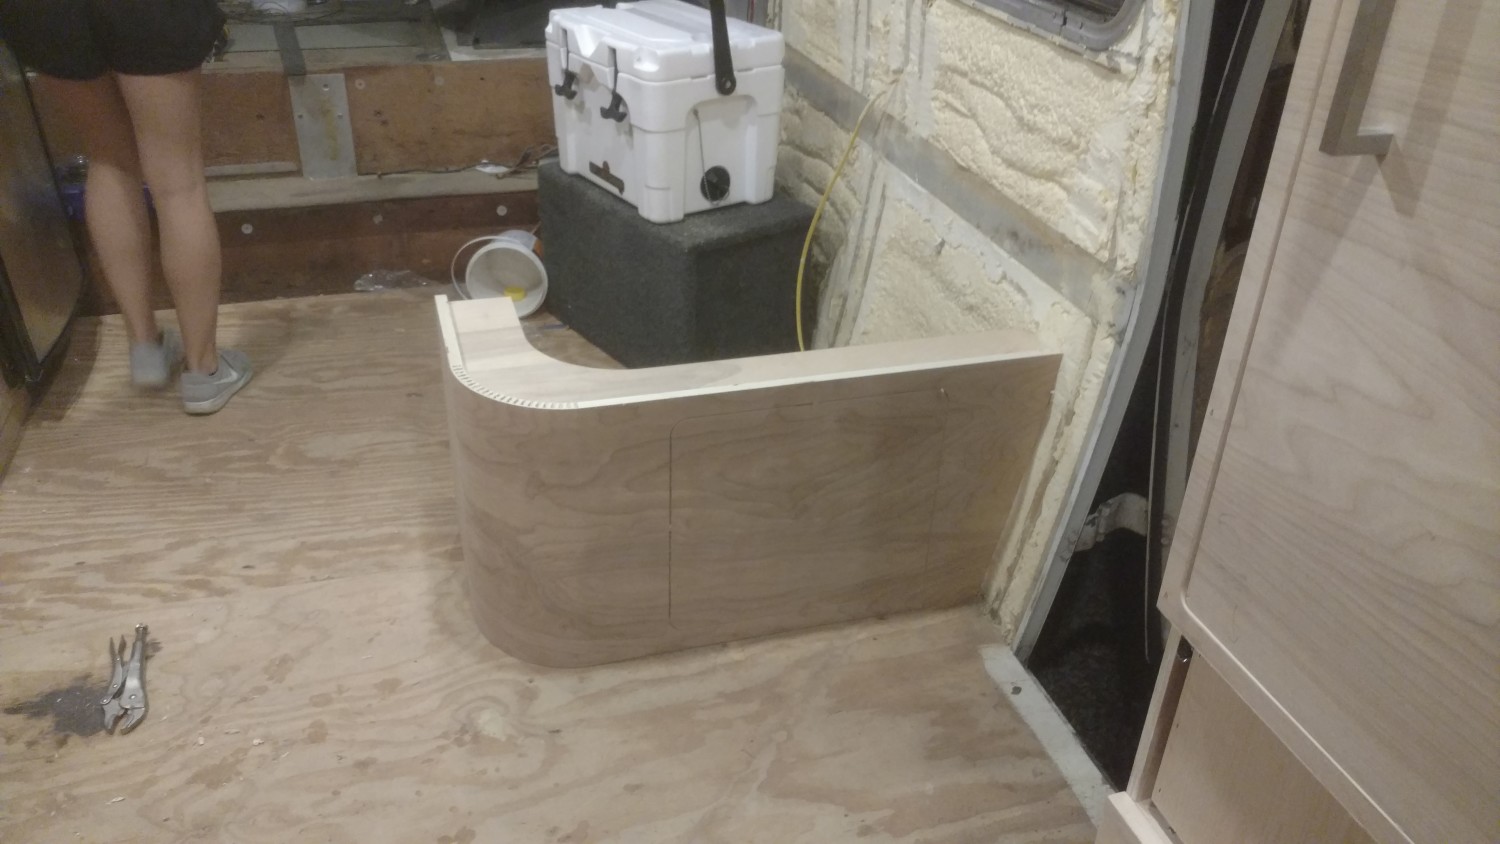
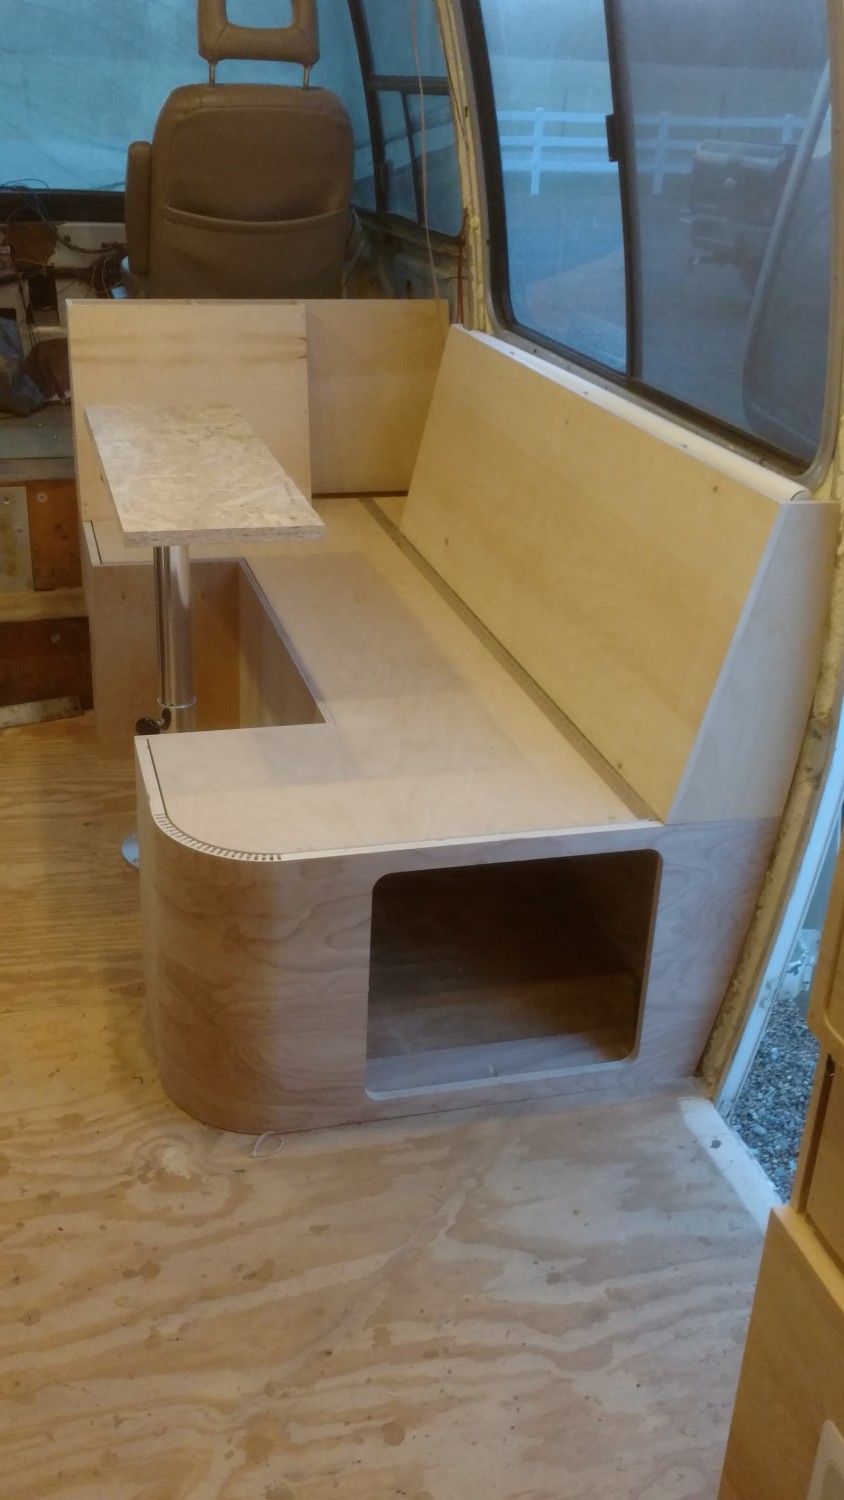
The basic premise is a large lounge/couch that also doubles as a dinette. The table sits on a raise-able pedestal and when lowered becomes part of the couch. When raised it’s a nice walnut dining table for 2. We wanted to round the edge so that the entrance to the coach didn’t feel constrained and tight (there he goes again with that visual space mumbo-jumbo). To do this we used an old method of curving wood with a twist. Using the CNC router we cut away strips on the inside of the curve to make the plywood flexible, we then fastened it to a frame and built from there:
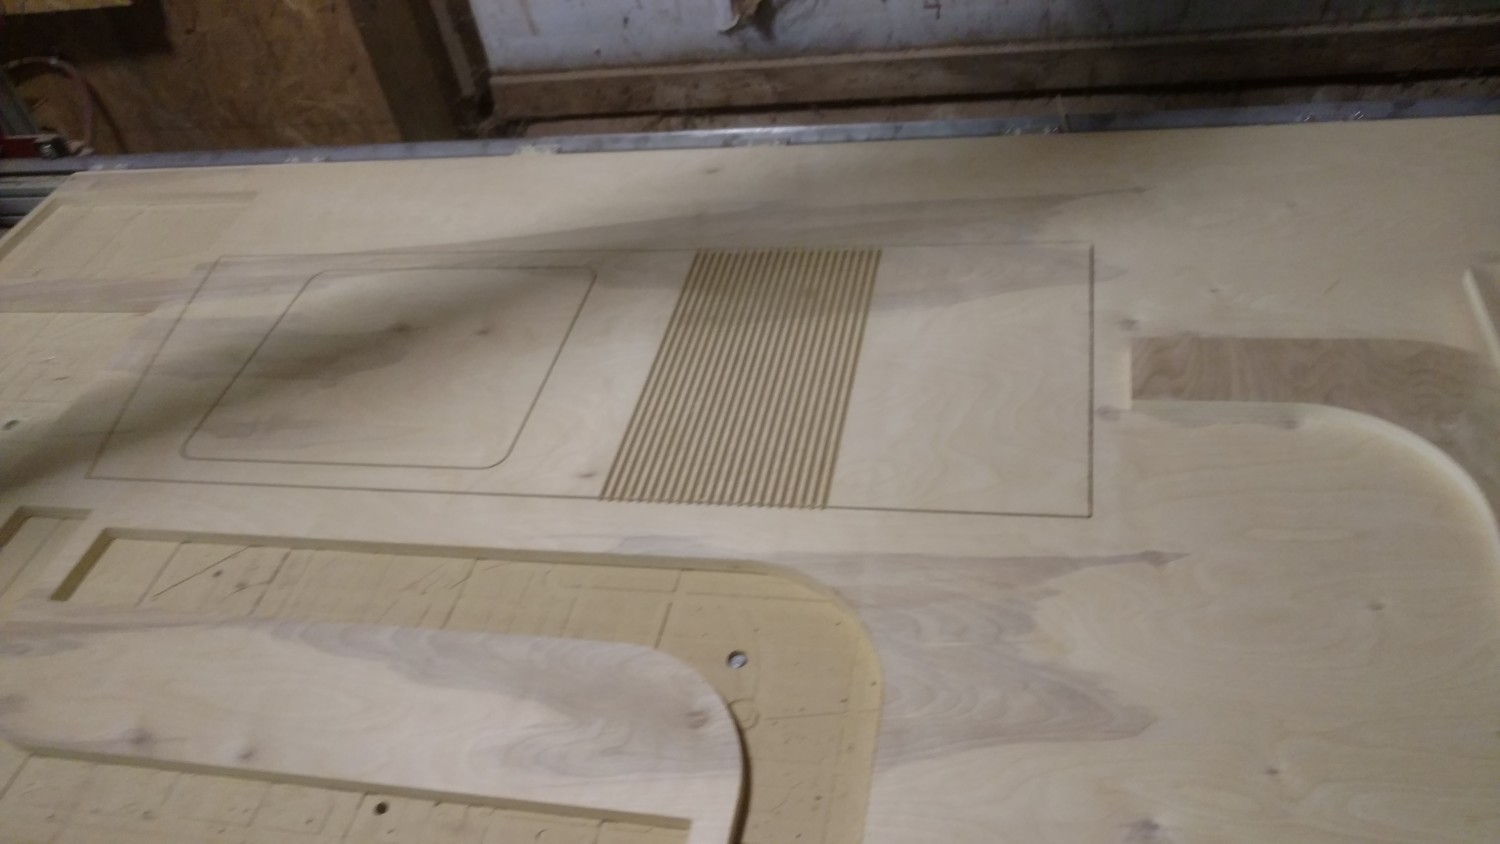
Other than countless hours of veneer work and finish sanding in preparation for paint, that’s pretty much how all of the cabinets were done. The bed headboard and foot-board were curved in the same manner as the dinette.
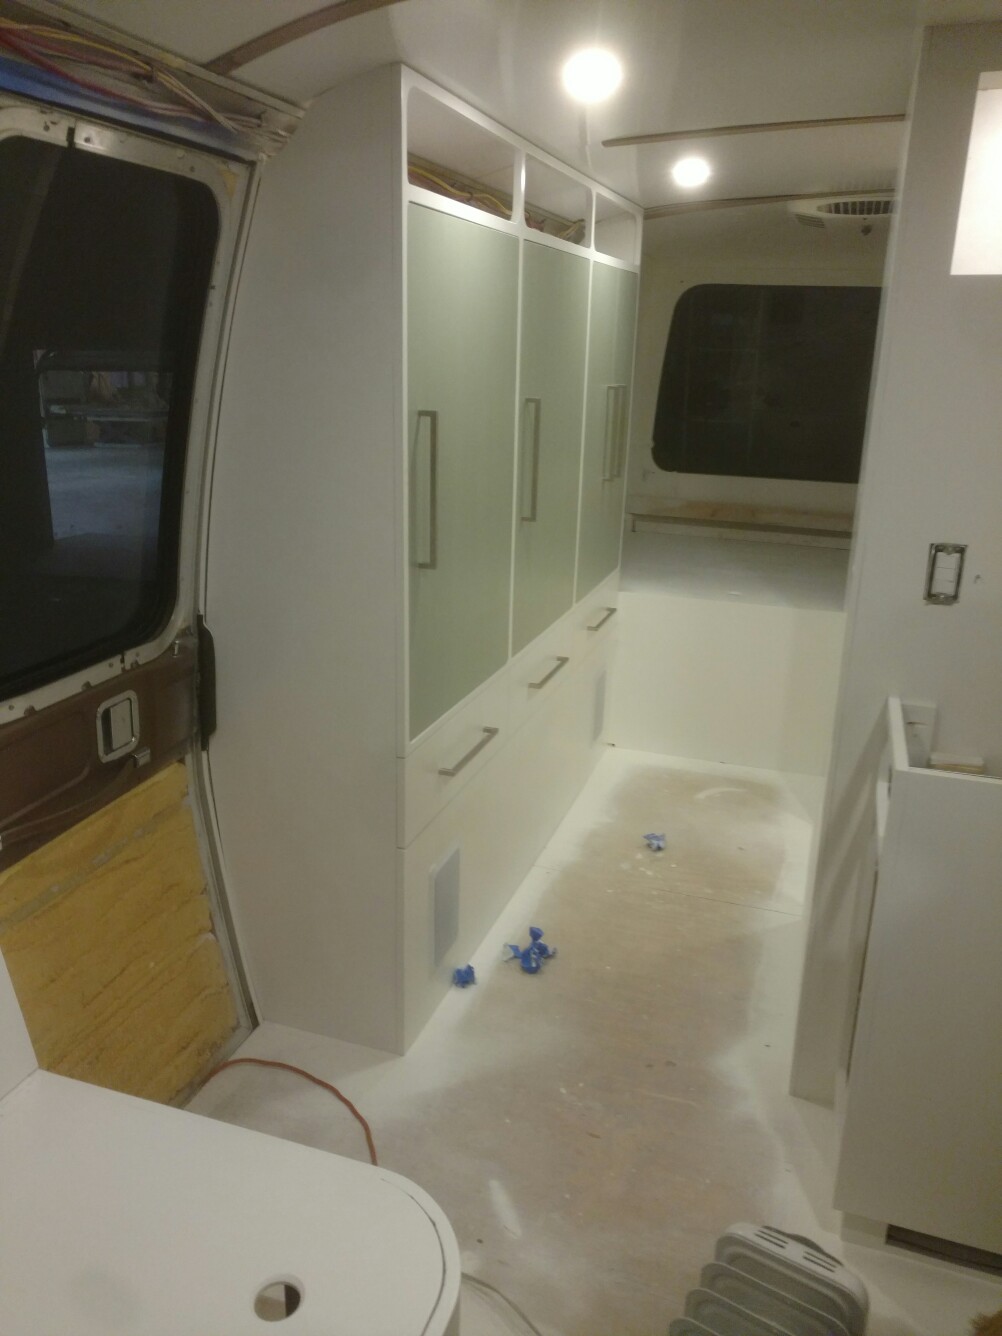
For paint we again wanted something modern, but with a 70’s vibe. We chose white for the base walls because it gives such a warm inviting feel. The problem with 95% of GMC motorhomes in my opinion is that they are all so dark and uninviting. White really changes that.
With the white we contrasted with a sage green on the cabinet doors, because again the goal was inviting, homey, and fun.
For the green we diluted the paint heavily and used a few layers, this allows the grain of the wood to show through which gives it an awesome earthy feel as opposed to a high gloss modern look. We then cleared over everything to keep it looking nice.
We rounded it out with oversize brushed nickel handles and pulls.

And that’s pretty much it for cabinets! It was a much, much longer process than it looks!
fantastic job You did ,one of the best we saw til now,realy beautiful.
We have in mind to rebuild the rear in the same way ,
is it possible to get more info about the bathroom ? drawing or just sketches ,we are living in the Netherlands and just rebuilding a Eleganza II , frontpart finnised now first holliday and this winter rebuilding kitchen, bathroom, sleeping room and storage.
thanks in advance
Teun Luigjes
This look wonderful.. we were really interested in your dinette..
Hi Justin. I was trying to locate your “Classic GMC Facebook” group post where you had the completed project photos, but was unsuccessful. Can you send me the URL so I can save it?
Thanks and congrats all the way around (completion and marriage). I love what you did to your GMC and I love to see the influx of young blood!
Karen Breen-Bondie
657 W. Drayton Avenue
Ferndale, MI 48220-2749
1978 Royale (Buskirk renovation)
Photos here: https://www.flickr.com/photos/kbreenbo/albums/72157670309011335
Video of interior here: https://www.youtube.com/watch?v=xcu5lceqg64
Owner since June 2016; loved ’em since I was a kid when they came out…I’m 55 and finhttps://www.flickr.com/photos/kbreenbo/albums/72157670309011335ally talked my husband into buying one!
Sorry, I typed my email addy wrong…see below
You guys did a fantastic job on your RV. I currently am about to renovate a 1978. I wanted to know if you would be willing to share some of the CAD you guys did, specifically the curvature of the walls from floor to ceiling. A floor plan would also be appreciated if you are willing to share it.
Thanks Alex,
Sure, shoot me an email and I’ll send it over. You can use the contact form on the front page.
I love… love…love the cupboard storage ideas you created which allows for a larger bathroom as well.
Do you still have the 3d files? Would love to use the same layout in mine in Australia.
We placed the door on the opposite side due to downunder regulations.
But a mirror version of that storage would be prefect.
Feel free to contact me if you can share the 3d cnc files
Regards
Dj
Hey Dejai, Sorry for the delay here but unfortunately all of my cad filed for this project were lost when a thumb drive corrupted.
Hi Justin, very impressed with your offset hallway, I want to do the same, can you share me your CAD drawings? russelltacken@gmail.com
Hey Russel,
Thanks! Unfortunately all of my cad filed for this project were lost when a thumb drive corrupted.
We LOVE what you’ve done! We’re considering the same. Can I purchase from you a complete set of CNCed flat plywood panels (less countertops) so I can assemble a clone? I can arrange pickup if you could please send price quote and delivery time to me.
Many thanks
Joe & Julie
Hey Julie,
Thanks! Unfortunately I lost the files for all of my GMC stuff when a thumb drive corrupted so I don’t have the files to make them again.
I really like the look you went for, the dark is gone. What does you floor plan look like on the drivers side in the back.
The back is all bed with the TV on a linear actuator recessing into the footboard
What did you use on your floor and did you replace your ceiling? If so I’m struggling to figure out materials. Thanks, I’m a 64 year old gal with no experience and maybe in over my head. Ha! I could use some advice.
Hey Jan,
We used CorTec on the floor but any waterproof vinyl flooring would work fine.
We did our ceiling in aluminum, but it can be done in a lot of ways. Most people go with FRP.
Justin,
What thickness of euro ply did you use for the cabinetry? I just purchased my 1973, and I am gearing up for a complete reno.
We used 1/2″ (13mm) ply for the majority of the build. Some 3/4″ in the rear bed area.