
If you have read any of the rest of this blog you know we have undertaken once hell of a project! We’re making headway on building the interior lately. Our inside storage is a good ways from the workshop, so every evening I walk up to the barn and start her up and pull her around in front of the shop so we can get to work. This has gone on all summer until one day it didn’t. Crank, Crank, Crank and no start. Ended up being no spark and a bad HEI distributor (fell apart from age).
I was planning on finishing the interior remodel before messing with the engine because, well it worked fine! But this changed plans. Our choices were to replace with another HEI and get on the road again or be the Guinea Pig and try to run a Fitech System with full spark control on the GMC. We decided on the second option and away we went.
The install itself is very straight forward, total install time was probably about 3-4 hours, a lot of which was spent scratching my head . The thing that took the most time was getting all the parts that are needed, I had to keep running back and forth to grab stuff that I didn’t know I needed. So first things first here are the tools you’re going to need:
- Standard Socket set
- Various wrenches and pliers
- Screw drivers of varying sizes
- Soldering Iron – (Solder every wire junction!)
- Solder – (high quality solder please)
- Crimper (I crimped then soldered all terminals)
- Heat Gun (for heat shrinking wire junctions)
- Grinder -(to cut the transmission kick down arm off the fitech)
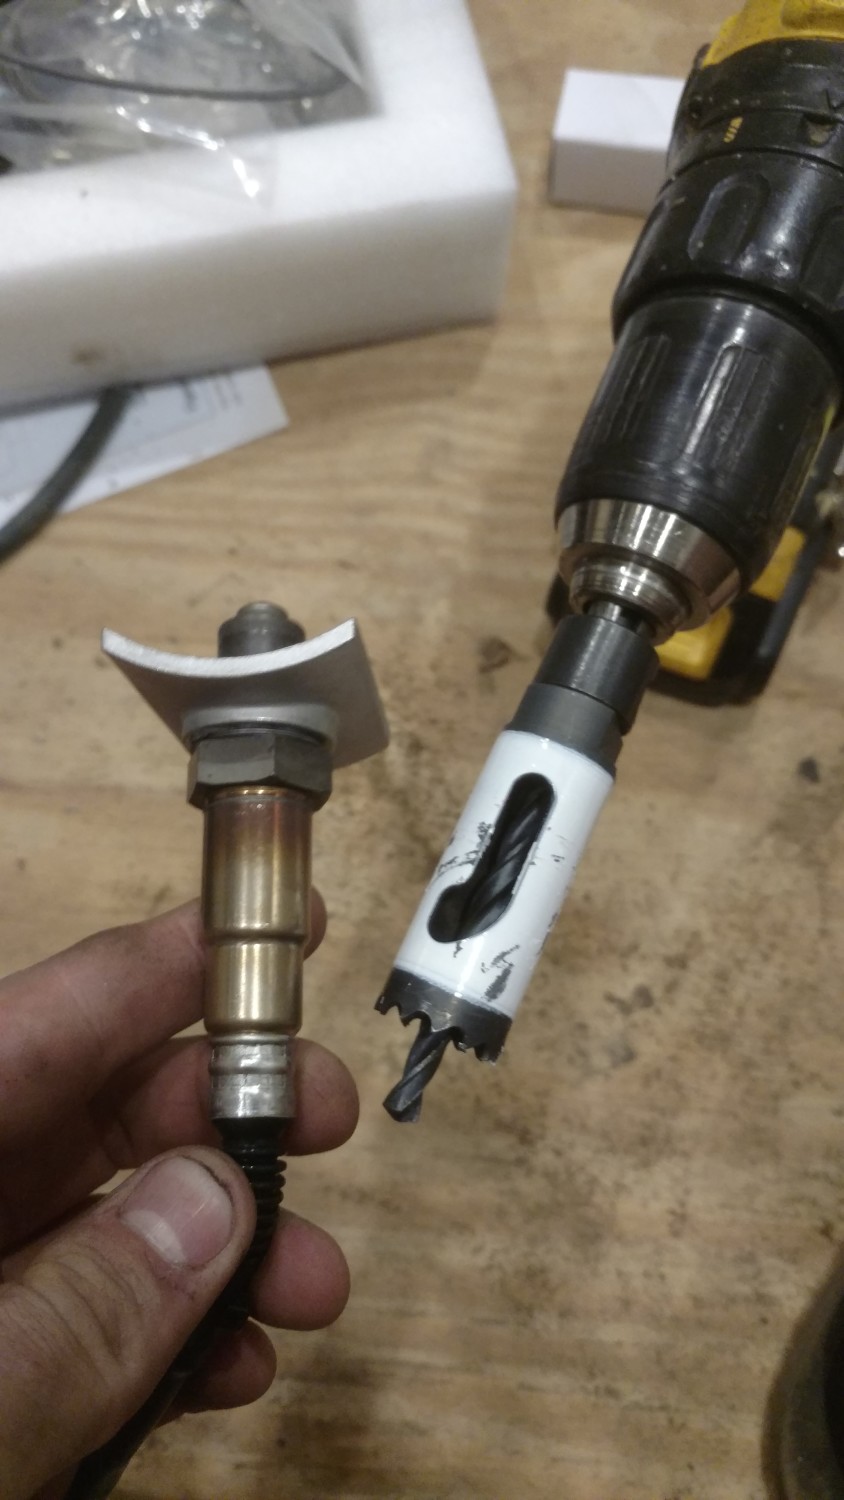
- 7/8″ Hole saw – (to mount the 02 sensor in the exhaust)
- Teflon tape (or pipe dope)- (for sealing the temp sensor)
- Allen wrenches
- Drill
- Self tapping screws
Like I said before my install was plagued with “oh shit I didn’t realize I needed that” so below you’ll find a list of everything that I used to do this install.
- Fitech 600 HP Kit
- Mr Gasket 1932 Square bore to quadrajet adapter
- Fitech Fuel Command Center Kit
- Carb linkage bushing 1/2 to 1/4 – Mr Gasket 6026
- Carb linkage stud kit – Holley 20-38 from NAPA
- 5′ of 3/8″ fuel line
- Various small stainless hose clamps (Fitech doesn’t include enough for some stupid reason)
- 1 5/8 -3″ Stainless Hose Clamps (2) to connect the O2 sensor (I’m doing headers later so I opted for the bolt on instead of welding it (temporary) I advise welding the bung to your exhaust)
- A few feet of different colored wire to extend the wires (I needed red, white, and black)
- Ring terminals for 18-22 gauge wire
- Heat shrink wrap 1/4″ or smaller
- Grommets for bringing the wires through the firewall
- I went ahead and put in new plugs and wires since I was messing with them anyway.
*If you (like me) still have the stock choke setup, you’ll need a blockoff plate for it (I just made one) available at summit and others. (HERE)
If you opt for timing control you will need in addition to what’s listed above
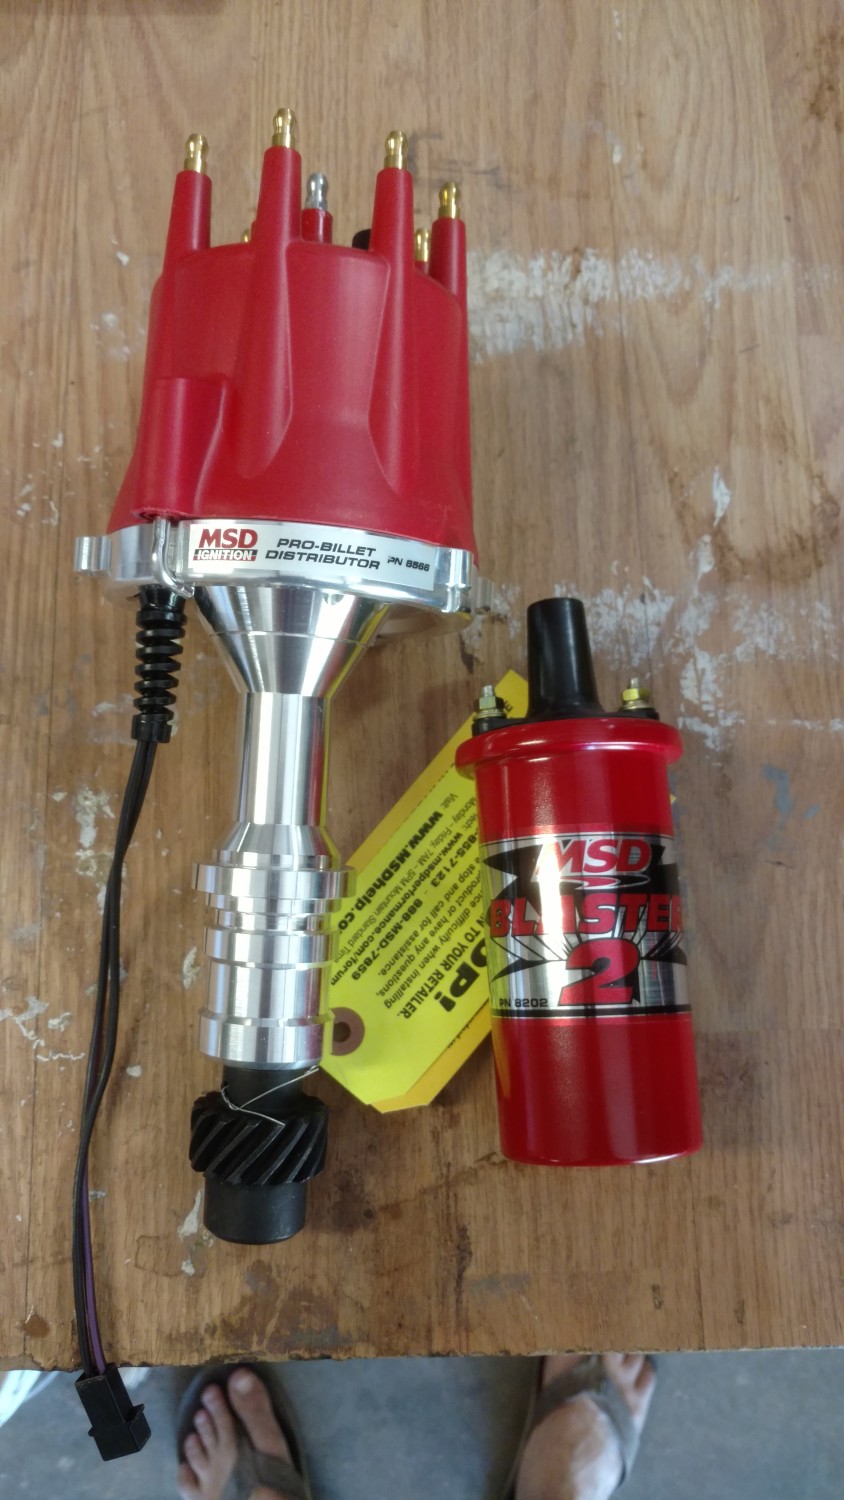
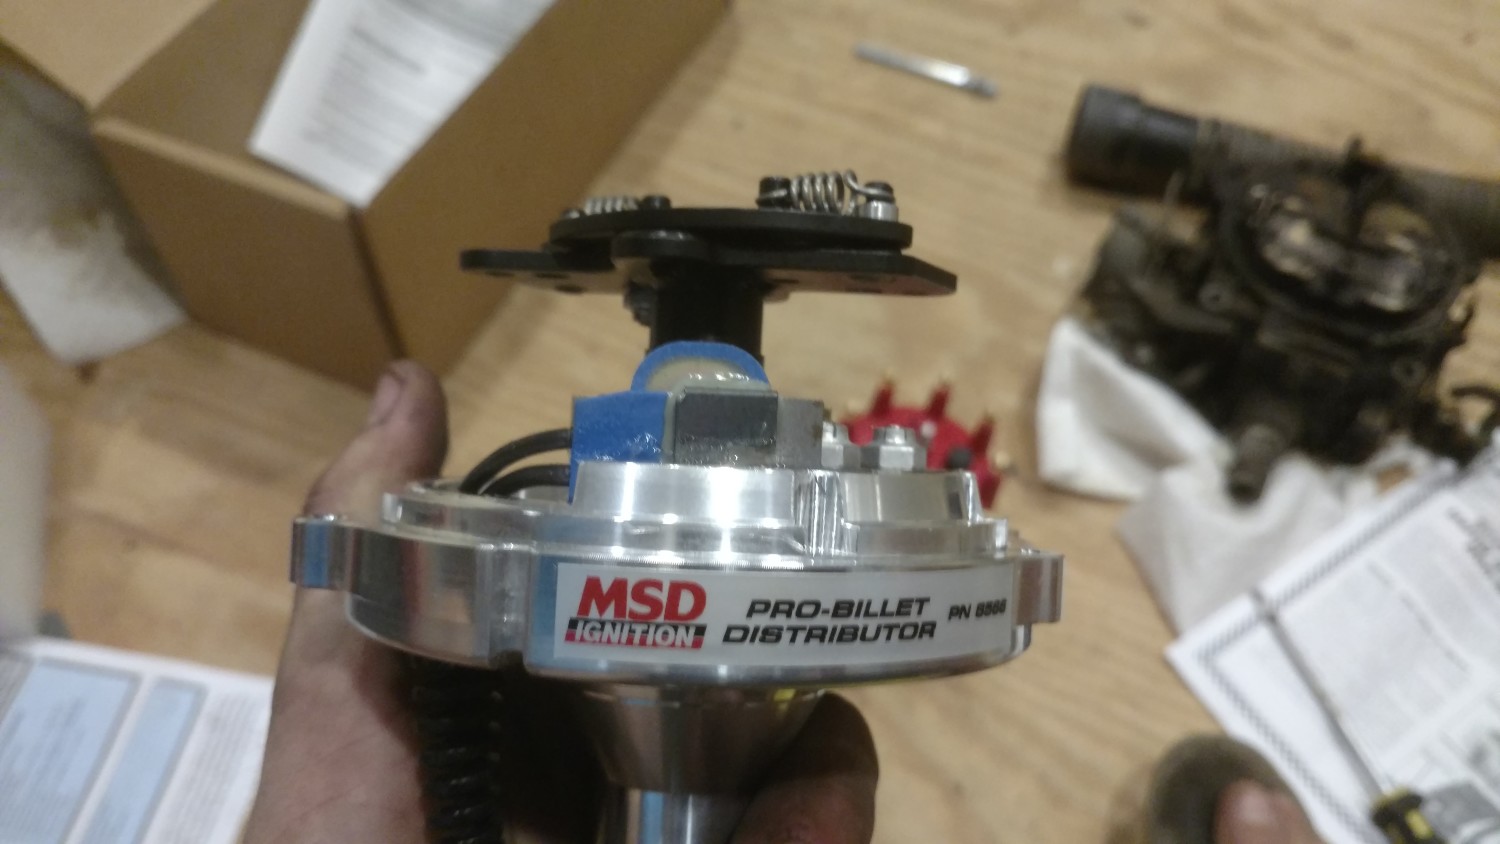
- MSD 8566 Pro Billet Distributor (locked out per the instructions in the box)
- MSD Blaster 2 Coil + the wire to connect it to the distributor
- Coil Bracket
That list is not as daunting as it looks I promise, but if you gather all of those tools, and all of those parts your install should be pretty smooth and simple!
Onward to the fun stuff!
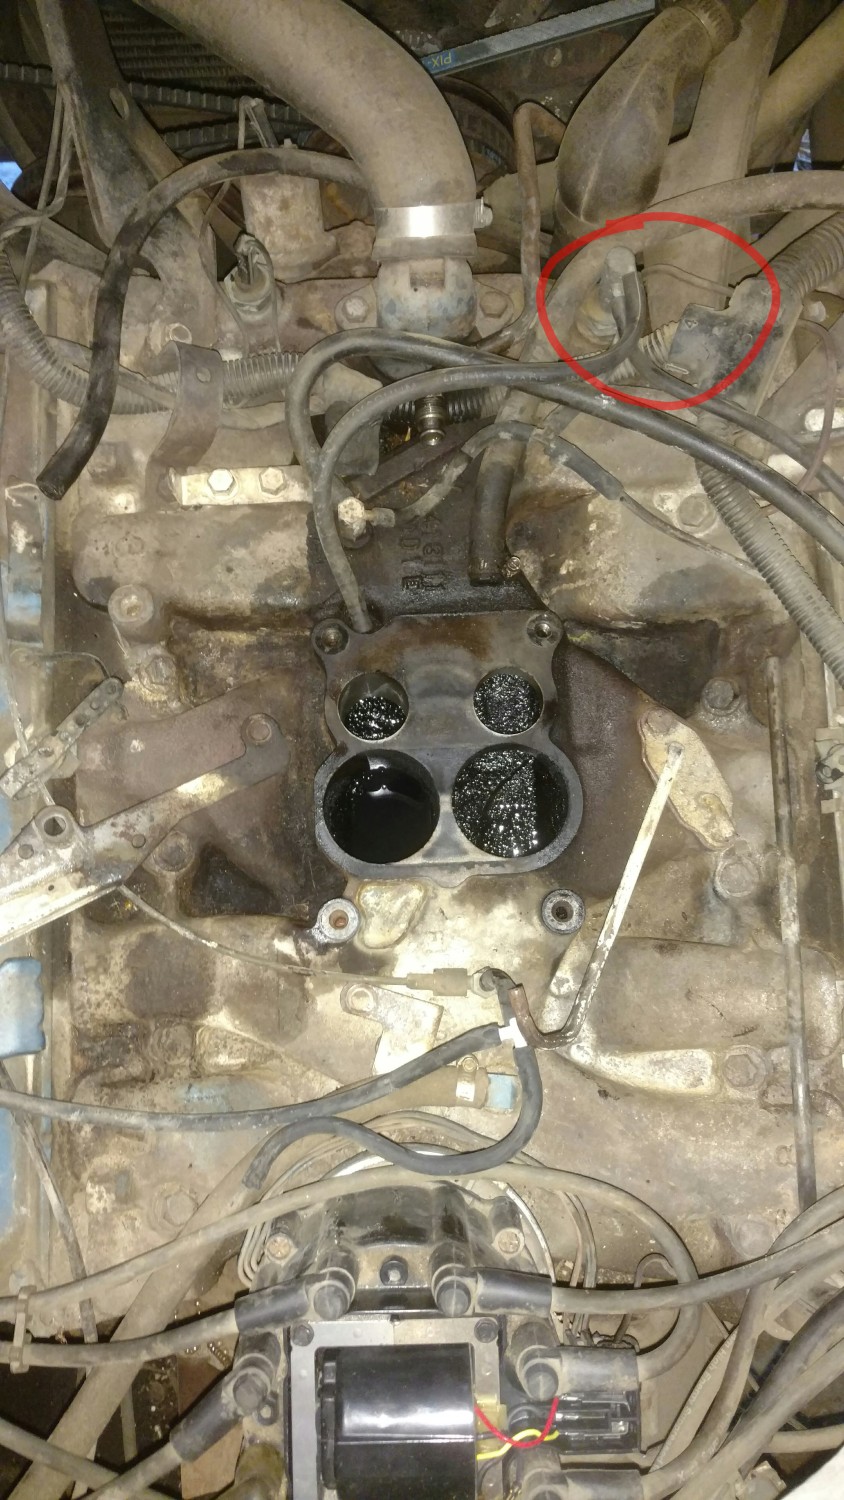
The first thing you’ll do is remove the stock carburetor, pretty simple. Remove the air cleaner and disconnect the fuel line and all vacuum lines going to the carb. Then remove the 4 bolts at the base and carefully remove it from the manifold, being careful to not drop a bunch of gunk into your engine from that nasty carb.
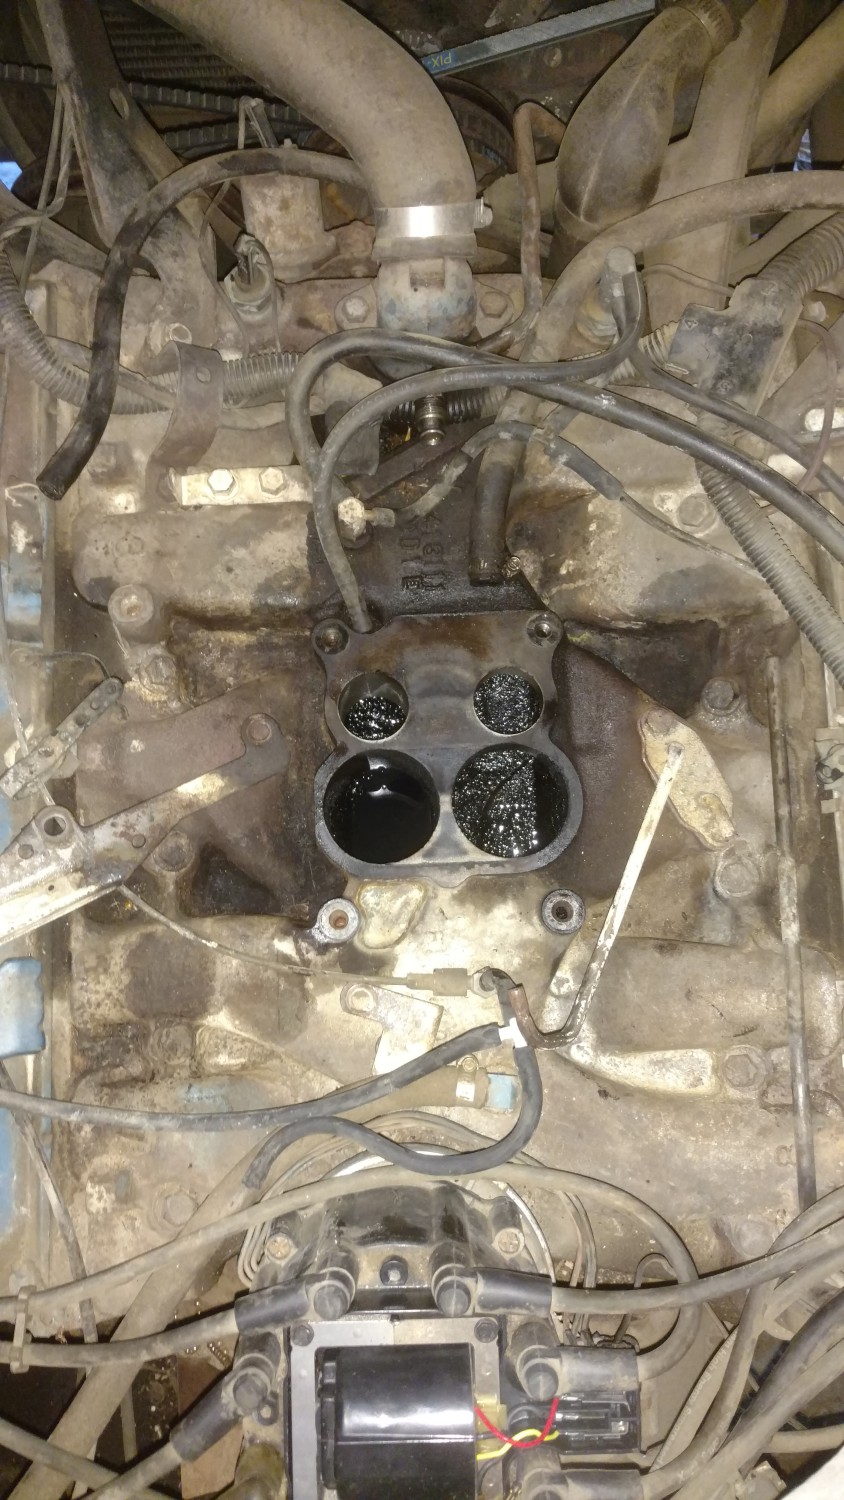
If you still have the stock choke, the heater is to the right of the carb and it needs to go, you can do as I did and make a blockoff plate, or buy one from summit etc. Now is the time to put that on, remove the 2 bolts, remove the heater, carefully remove the old gasket and bolt on the blockoff plate. Easy peasy.
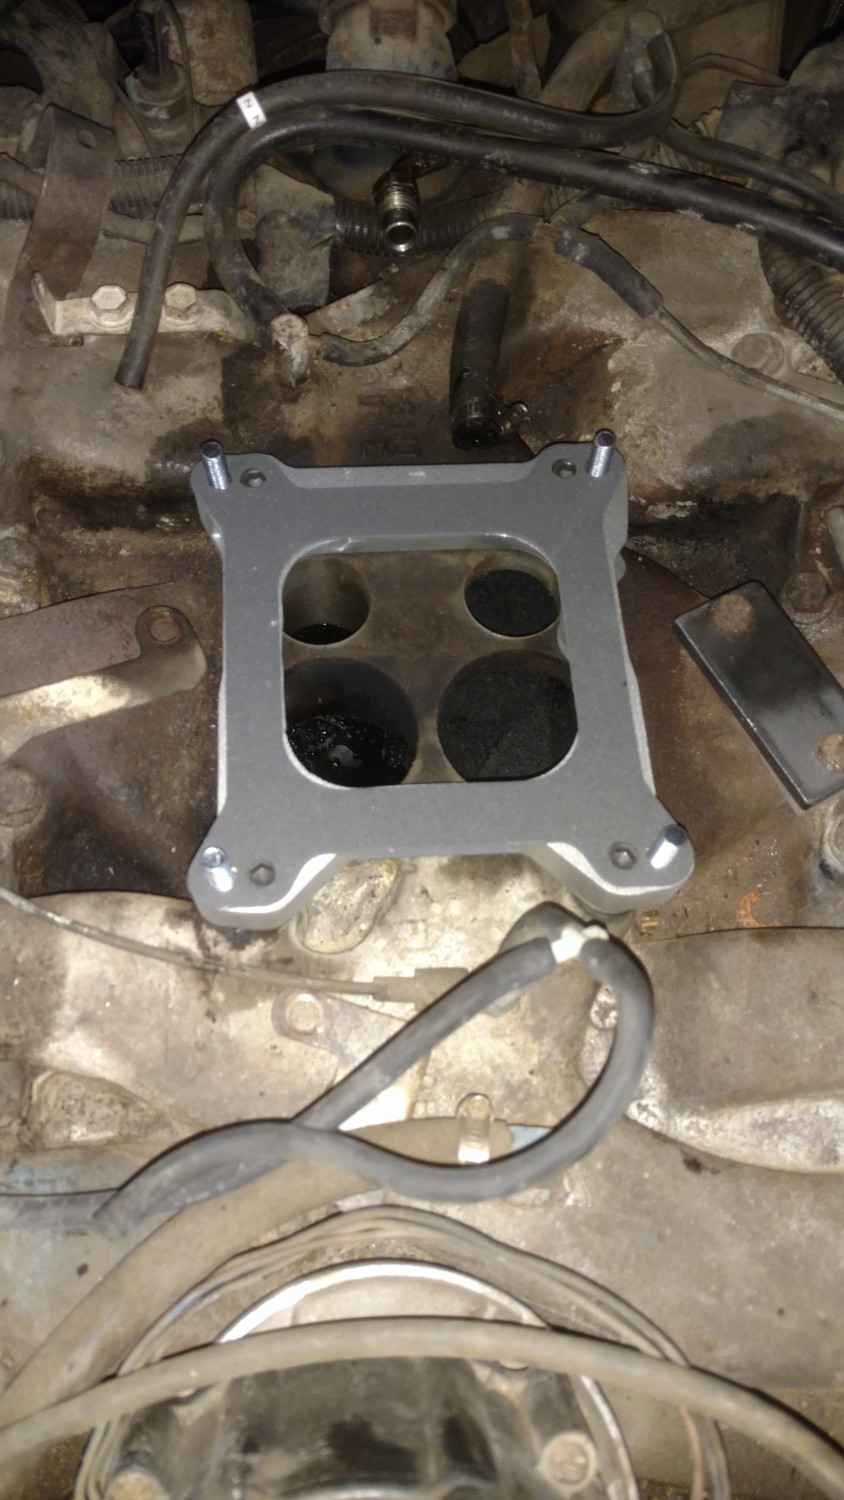
Next up is covering that big gaping hole in your engine that is just asking you to drop tools into it. So install your carb spacer now. This will vary by which spacer you choose, but basically you’ll install bolts from the bottom side and then bolt it on with a gasket. The MR Gasket spacer has a nice curved transition to help smooth the air flow in the transition, and doesn’t cover up any of the intake like some others do.
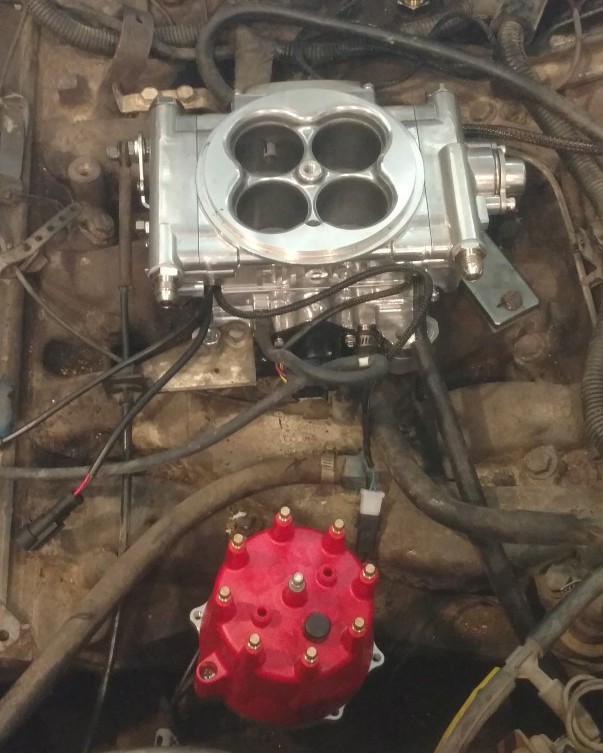
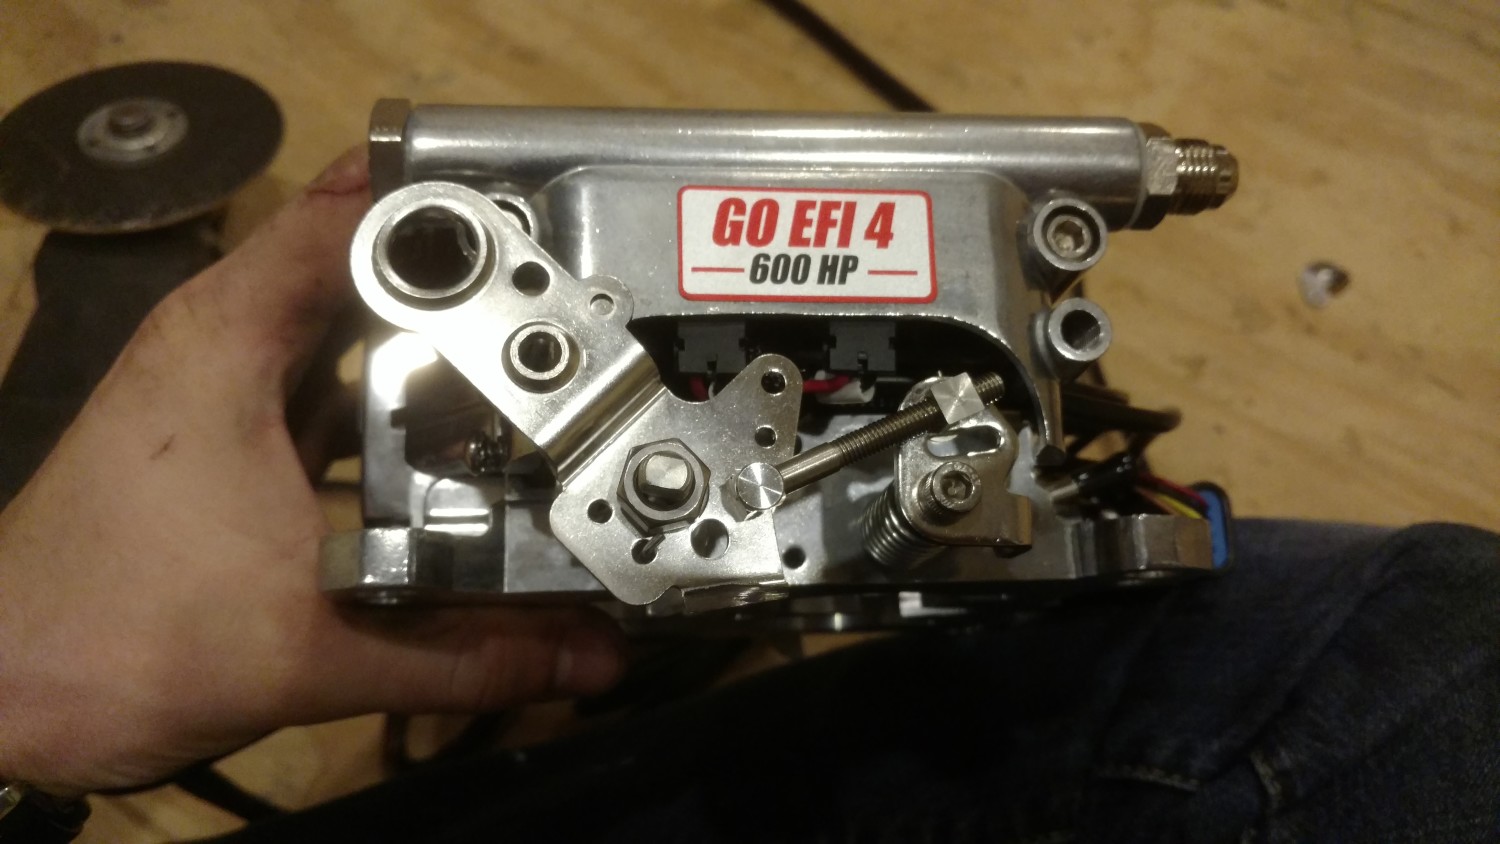
Next up is the install of the throttle body itself, this is as easy as bolting it on, but does require one modification first. The fitech is a universal product, and comes with a transmission kickdown arm on the throttle body. This arm runs right into thee manifold on our GMC’s and has to be cut off. No worries you don’t need it and it’s a 10 second job. Mark it with a sharpie and lop it off with your tool of choice, I used an angle grinder. A dremel will work just as well.

Now bolt the throttle body the the intake to cover that big nasty hole and breathe a sigh of relief that you didn’t lose any tools down there.
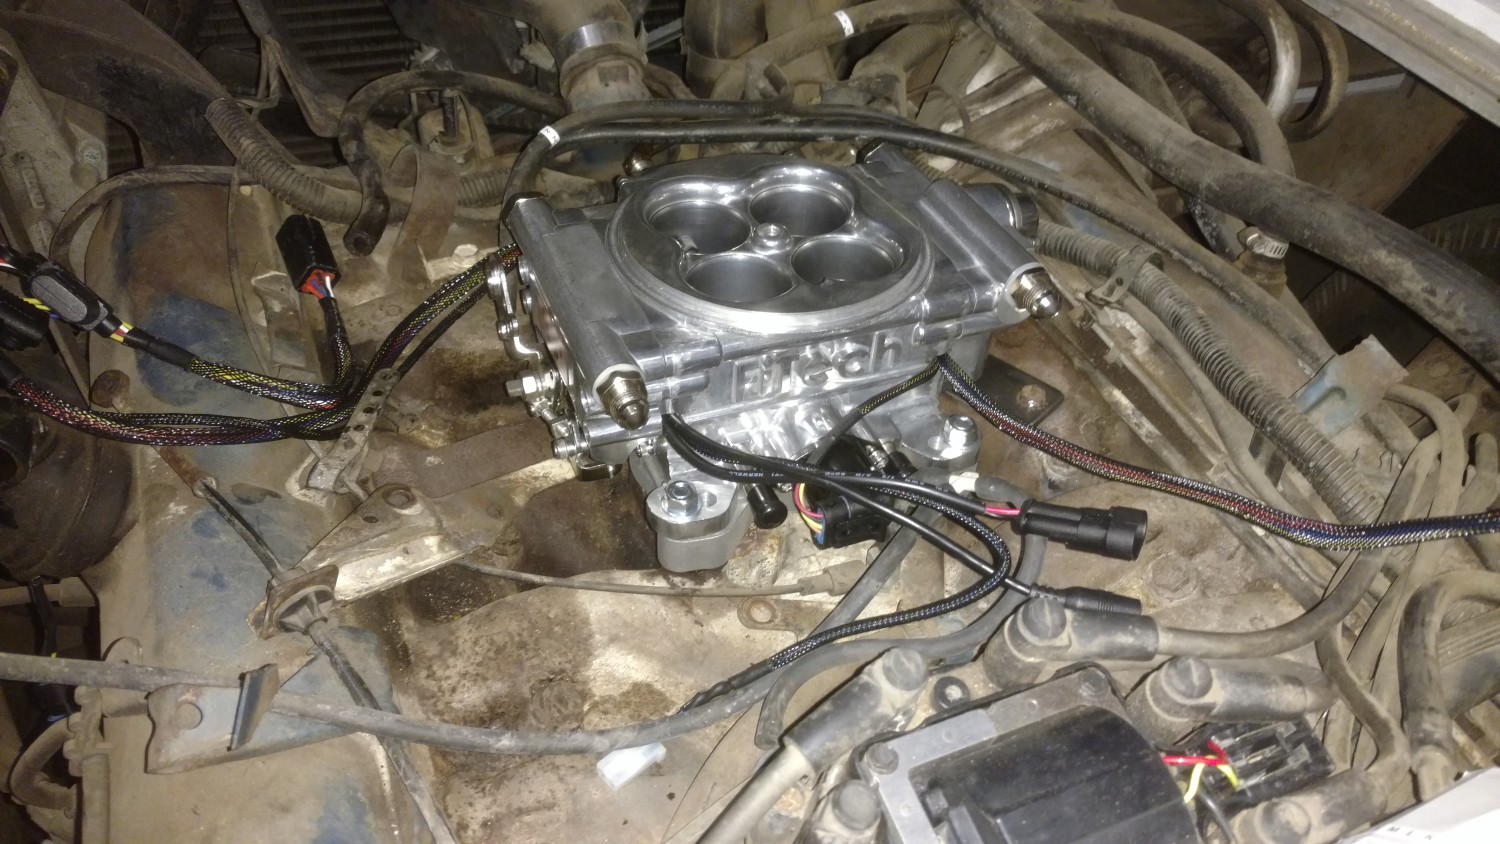
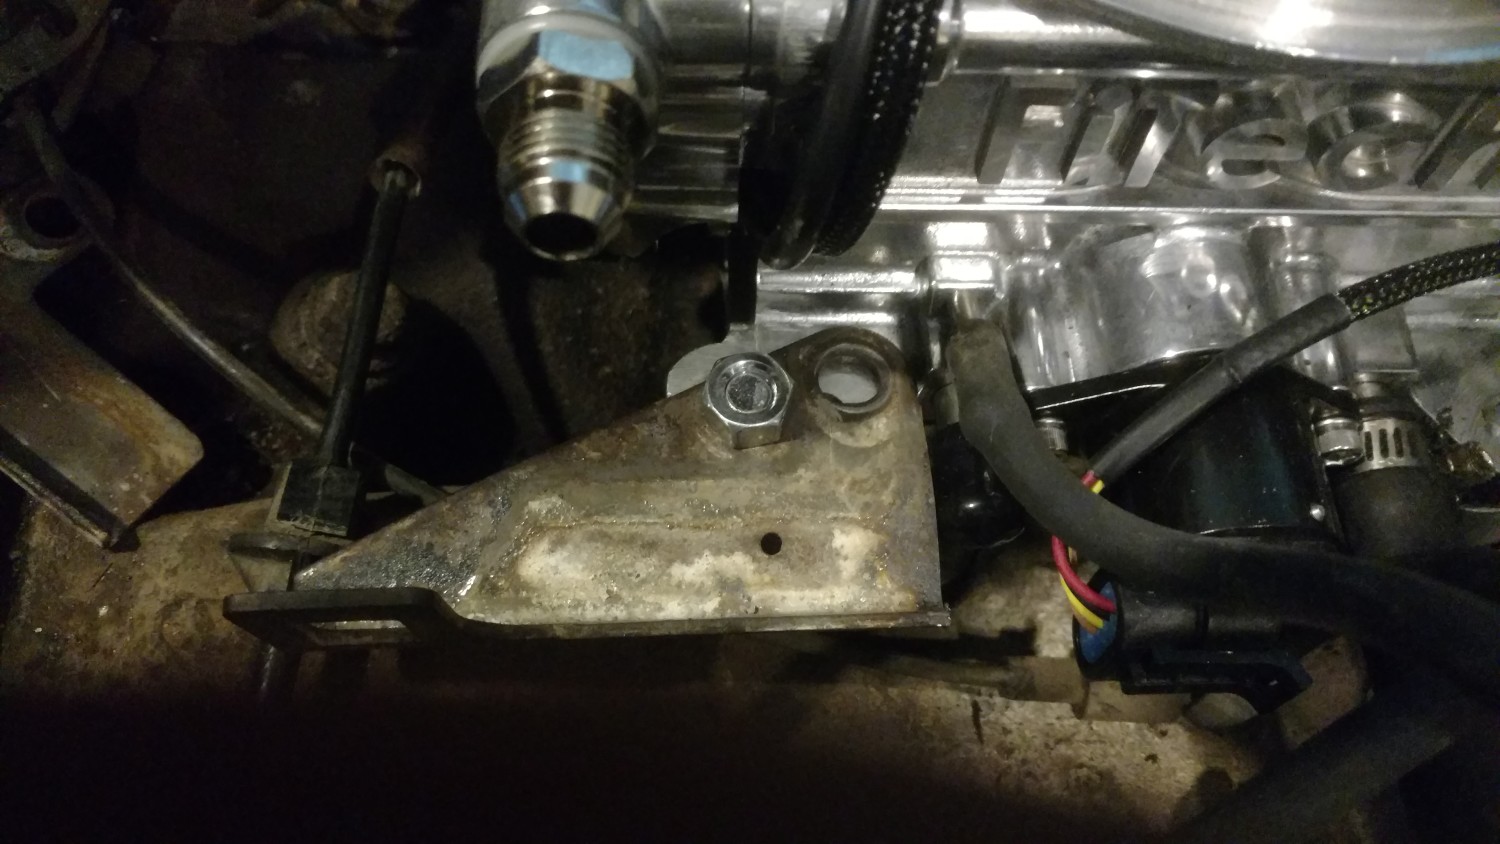
Now is the time to reconnect the throttle cable. I turned an adapter on the Lathe, but the parts required are listed above if you want to go off the shelf. You’ll need to modify the stock throttle holder bracket to bolt to the Fitech, I cut it down a bit with the grinder and bolted it back in place in a way that won’t allow it to pivot. Works fine.
From here you’ll want to install the temp sensor. You can replace the stock temp sensor, but many are still using it (myself included) so there is another option. The Christmas tree TVS Valve is not needed in this application (you can do away with it anyway if you’d like, but you’ll have to rework your distributor vacuum advance. For me using the Fitech for spark there is no need for it at all) so the temp sensor goes there. Make sure to use a quality Teflon Tape on all the fittings, don’t rely on the sealer that’s on it from the factory. You’ll need to install the included 1/2″NPT to 3/8 NPT adapter first and then screw in the temp sensor. Go ahead and connect it to the Fitech.
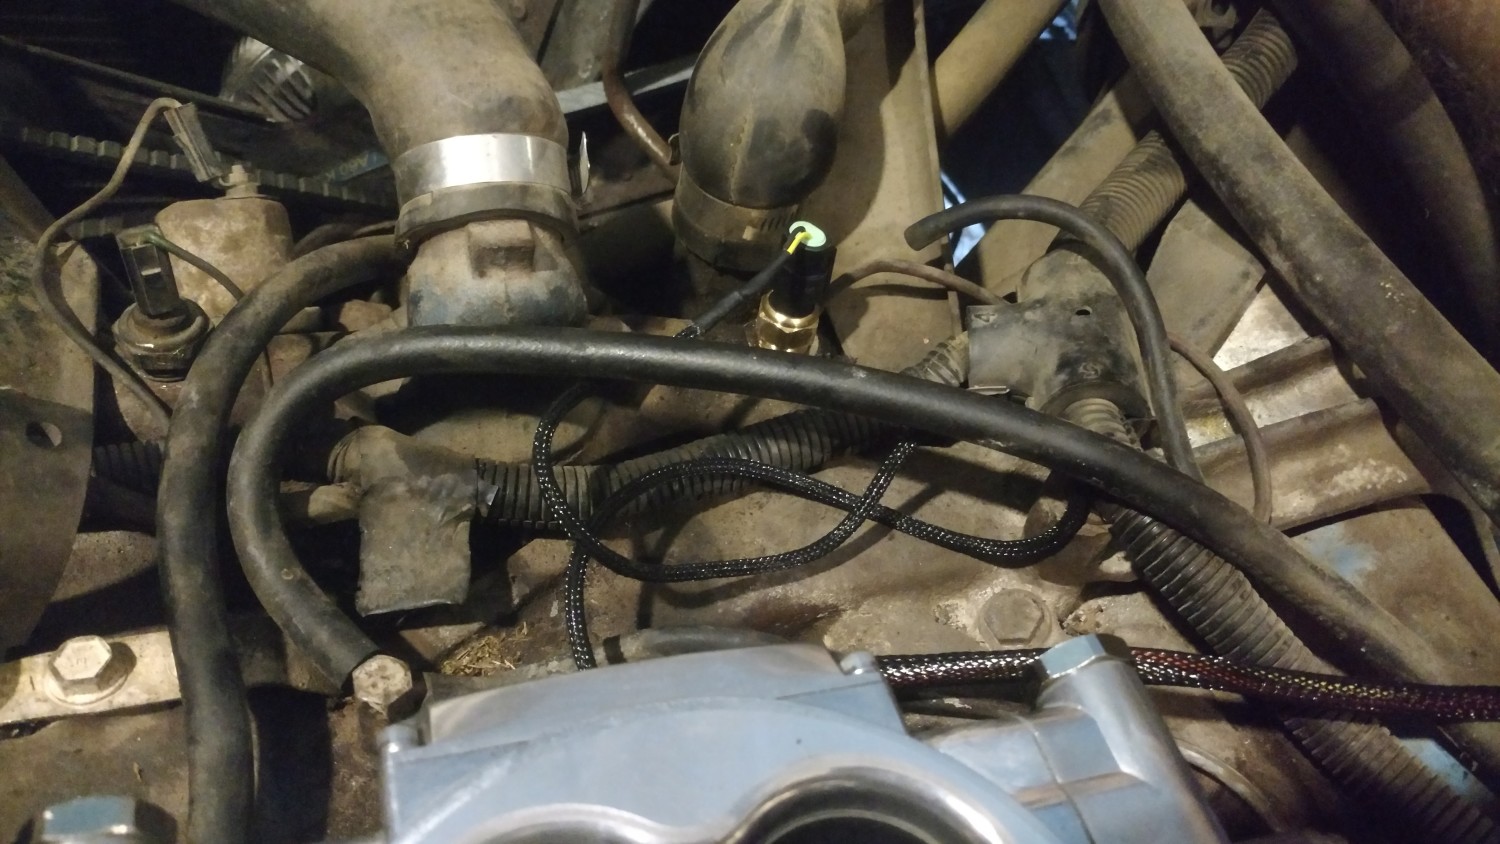
The O2 sensor is next, if needs to be installed in the exhaust just rear of the collector and on the top side of the pipe (greater than 10 degrees above horizontal) I put mine on the driver side as it was easier to get the drill in there to drill the hole. The kit comes with a bung that can either be welded in or clamped on. I’ll be installing Manny’s headers in the near future so I opted to clamp it on for the moment and it does work well) I advise welding the bung in place. Once it’s in connect it and on to the next thing!
At this point if you’re not using the command center you’re all done except for the wiring.
If you’re using the command center you need to find a place to put it, preferably somewhere with some cooling airflow. I’ll leave this up to you, but mine’s on the driver side left of the radiator which after 6000 miles of testing works well. Wherever you decide it’s a simple 4 bolt mount for the CC and then you need to plumb it, it’s pretty straightforward. Standard fuel line from the mechanical fuel pump to the inlet of the CC and then included FI hose and fittings from the output to the Fitech. The fuel injection rated hose is a total bitch to work with, it’s nearly impossible to get the fittings to go into it, I ended up having to clamp the fittings in a vice and use every bit of strength I could muster to get the hose to slide over them. This was the most difficult part of the whole install. After going through that ordeal I realized I could put the end of the hose in boiling water for a moment to make it more pliable!

You will then need to run a return line from the vent on the CC to your tanks. I used 1/4″ fuel line to a 1/4″ hose barb fitting that I drilled and tapped into the filler neck. It’s about a 5 minute job and completely worth the effort.
And that’s about it! All that’s left is wiring. You wire the red wire to the battery +, the orange wire goes to the command center +, and the white wire goes to a switched 12V+ source.
I (and fitech) highly recommend soldering all of your connections. Use a linemans splice to lengthen the wires and crimp on ring terminals on the ends and then solder the wire in after crimping. The only ground you need is a good engine ground and the ground the command center. I went to the frame and have had no issues.
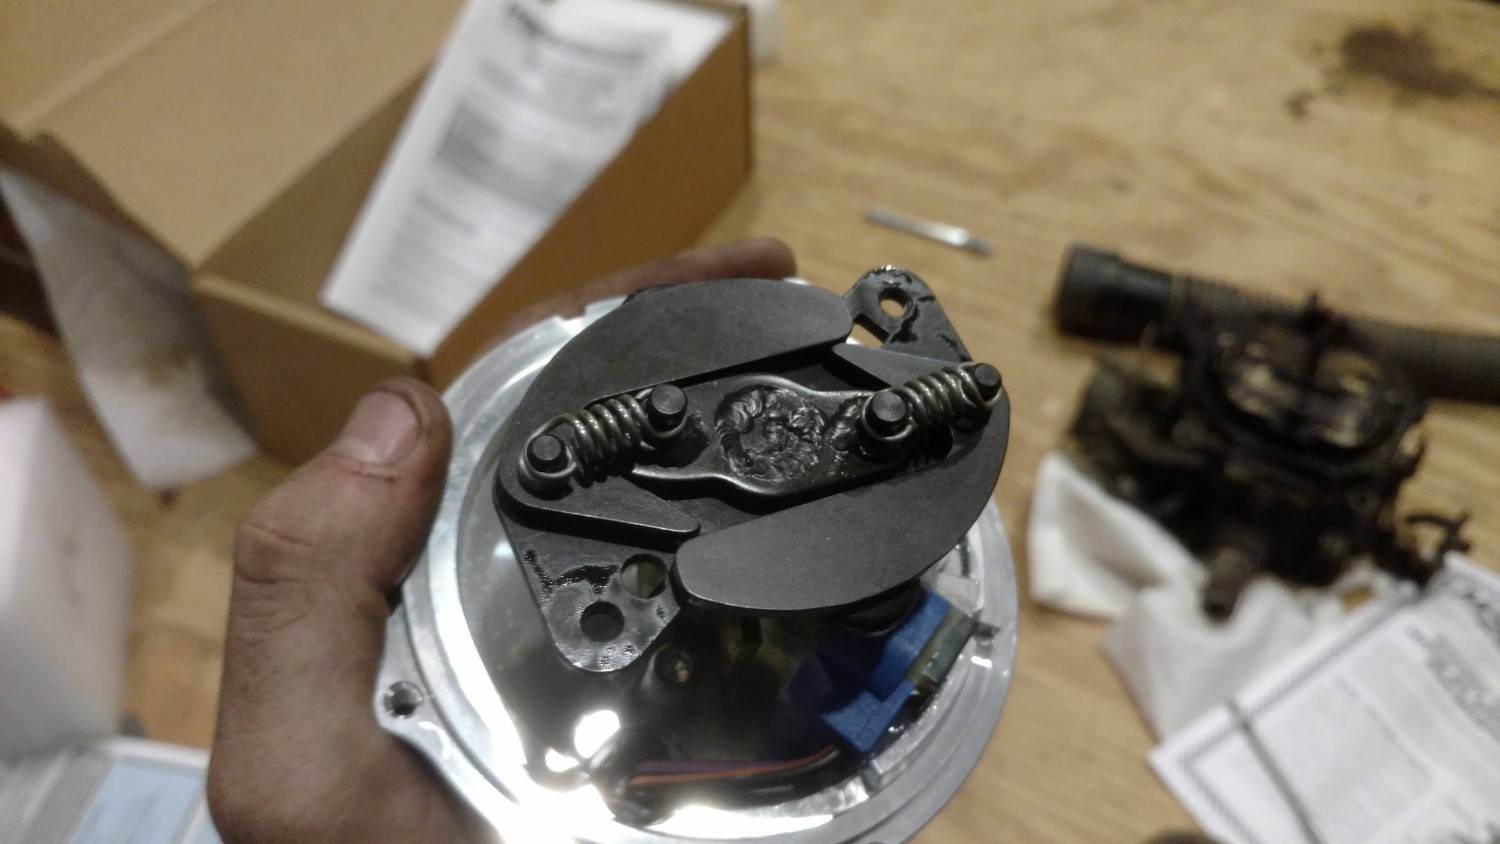
I decided to also add the ability to control the spark. For this you just need a MSD Pro-Billet distributor and a coil, I chose the blaster 2 on Fitech’s recommendation.
You’ll need to lock out the advance, which is explained fully in the MSD manual, no surprises there.
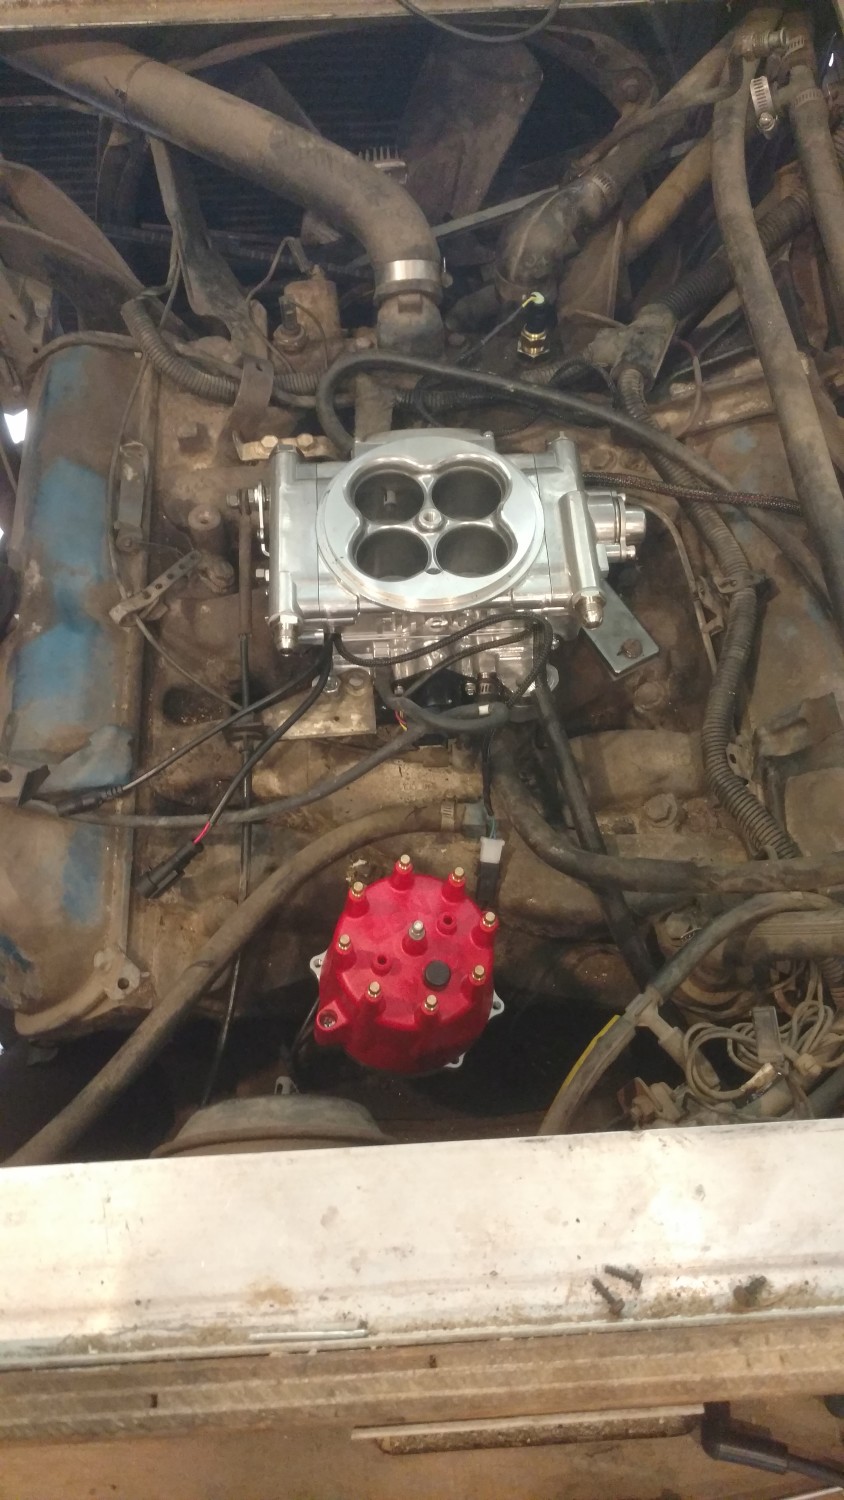
Swap the dizzy just like you would any other, mark the location of the rotor, pull the old and put the new in the same spot. Easy as that.
I had one hell of a time removing the old dizzy, it took a lot of PB blaster, a lot of hammering and levering to get it out. I actually broke it in half before it came loose.
Once the MSD is in you’ll want to set the engine to your base timing. So turn the engine by hand (1 1/8 socket on the harmonic balancer bolt) until the timing mark lines up with 8 degrees on the marker. From here line the magnetic pickup in the MSD up with the sender and lock it down. All of this is in the fitech instructions and there’s no difference for out GMC’s.
FIRE IT UP!
Follow the Fitech instructions here and setup the handheld controller for our engines. Change the PWM setting for the command center if you’re running it. (LINK HERE)
Once you’ve double checked and triple checked all your connections it’s time to crank her up. Mine started within 1 second of cranking, yours may take longer or shorter. I primed the command center with my low pressure electronic fuel pump beforehand so that helped. It’s been a joy so far!
Whether your air cleaner will fit or not is going to depend on your coach, they are all a little different. Mine did not want to fit, so I replaced the stock filter with a lower profile edelbrock that I got at auto zone. It works fine, I’ll need to plumb valve cover vent into it, but otherwise seems to do it’s job just fine.
Notes from 6000 miles later:
I was absolutely plagued with vapor lock on hot days even with the Command center. After almost pulling my hair out and in an act of desperation while on a 5000 mile road trip I re-plumbed the fuel lines to bypass the mechanical pump AND the engine compartment all together. This completely solved the problem. 6000 miles later and not a single stumble.
The mechanical pump in conjunction with fuel lines running into and out of the engine compartment were adding so much heat to the fuel that it was boiling in the FCC.
DO NOT run a mechanical pump with a fitech fuel commend center. Block it off, or keep it as backup, but run a high quality electric pump (carter) on the frame rail to feed the FCC. This will save you a LOT of hassle down the line.
There has been at least one Command Center that arrived with the float stuck so that fuel is constantly flowing out of the vent line. I don’t think it would be safe to operate with that open.
Armand,
Agreed, my thoughts are that I will vent it to the rear of the coach to atmosphere. My thinking here is that if the thing is overflowing I want to know it rather than just have it flowing back into the tank. When I asked the guys at fitech about it their response was “eh, it will still work fine if the float sticks open”. So I really think they are just covering their asses and trying to avoid having to replace faulty floats by covering up the problem (if there is a problem). Their initial marketing was tilted heavily toward “no need for a return line to the tank!” and now they ship the CC with a tag stuck on the vent line that says “MUST be plumbed to the gas tank”. As I said, to each their own, but this is my plan anyway.
I just got the needed command center today. I’m leaving on a 4k mile trip on Friday (4 days from now). Would you trust it?
Great posting, thanks. I have mine ready to install on my Caddy so your if was a lot of help. I won’t get to it for a week or two but I am in no hurry.
Manny’s headers come with two SS O2 bungs, one installed in each collector. That is the way I had them built.
Is there any noticeable change in performance. Is the main justification reliability?
There is a very noticeable increase in throttle response. Overall power difference is not noticeable I’d say. It overall runs smoother and just better throughout the RPM range.
Justin: What is in your opinion, the advantage of the FCC over an inline fuel pump, when you have to plumb a return line anyway? The FItech offered inline pump is $150 cheaper…
At this point I see no real advantage to the FCC.
Initially it had the advantage of being able to run without a return line and in conjunction with the mechanical fuel pump. Both of which turned out to be marketing hype in my experience.
I found in my testing that the mechanical pump and the lines going to it add way too much heat to the fuel and cause vapor lock. (I speculate this is the cause of a lot of vapor lock on carbureted engines as well) I also found that there needs to be a return line from the FCC to the fuel filler in order for it to operate properly. I even went so far as to remove the float completely and I now run it as a permanently circulating sump system (it’s constantly overflowing back into the tank).
If I were doing it again I would use an inline pump on the outside frame rail, inside a vented enclosure and rubber mounted for sound deadening. I would then run all new (hard) fuel lines directly from that pump to the Fitech, bypassing as much of the engine bay as possible.
I have rerouted my lines in 3/8 hard fuel lines up the driver side outer frame rail and to the Fitech with as little time spent in the engine compartment as possible. So far about 7000 miles later no more vapor lock no matter the temperature, length of climb etc.
Another way to reduce heat is to install the FCC in front of the radiator per Jerry Work (http://gmcws.org/blog/fitech-is-the-real-deal-by-jerry-work/). I did this with my Edelbrock fuel sump serving my FAST EZ gen.1 EFI and have no performance issues. I bypassed the mechanical fuel pump by installing a Carter P4070 pump on the outside of the frame rails back by the tanks, just in front of the selector switch and filter. With a small amount of rubber cushion, the pump is barely audible (it’s actually nice to be able to hear it at idle). My ISSUE is getting a distributor for my Caddy 500 that I can tie into the 600hp FiTech system for better spark control/economy; any ideas appreciated.
Did you ever remove your intake manifold and block off the exhaust crossover and also check for cracks? It seems to be highly recommended to eliminate that source of extra heat.
Do you still find the FiTech to be highly reliable and better than a carb rebuild?
Hey James,
Sorry for the (massive) delay in getting back to you, work’s been a bear lately.
I do still find it fully reliable, it always cranks right up and I’ve had no issues since the initial tweaking phase. About 10K miles so far without a hiccup.
Hi James, Installed a Fitech system this spring on my 1978 Royale with a 403
Did not use the FCC, had to modify the air cleaner to make clearance for the supply/return fuel lines. Starts/runs great. Thanks for your posting. Made things easier.
What are the results on performance on the 403?
Having not driven one with a 403 and fitech I can’t comment directly. I can however say that it really woke up my 455 and should do the same on our 403 assuming your carb is not in 100% working order. EFI alone is not a huge performance booster, it’s just more accurate, smooth, easier starting and handles altitude variation much better.
How did this affect fuel smell? I know after parking, it takes a while for the fuel smell to dissipate in the cabin. I likely need to seal the cab off from the engine compartment better but was wondering if this helped.
Hey Hugo,
I don’t notice any fuel smell at all after the fitech. You’re probably smelling the fuel boiling off in the carburetor float bowl once the engine stops and heat soak sets in, sealing the hatch and cabin better will help but EFI means no fuel evaporation so it solves that problem.