
One of the things that I was most disappointed in the stock GMC was the lighting. Something about it just felt off. From the weird rectangle things under the upper cabinets to the undercabinets that reminded me of an emergency exit path on a plane, I just didn’t dig it. Add that to the lack of decent overhead lighting and we’ve got a recipe for a change!
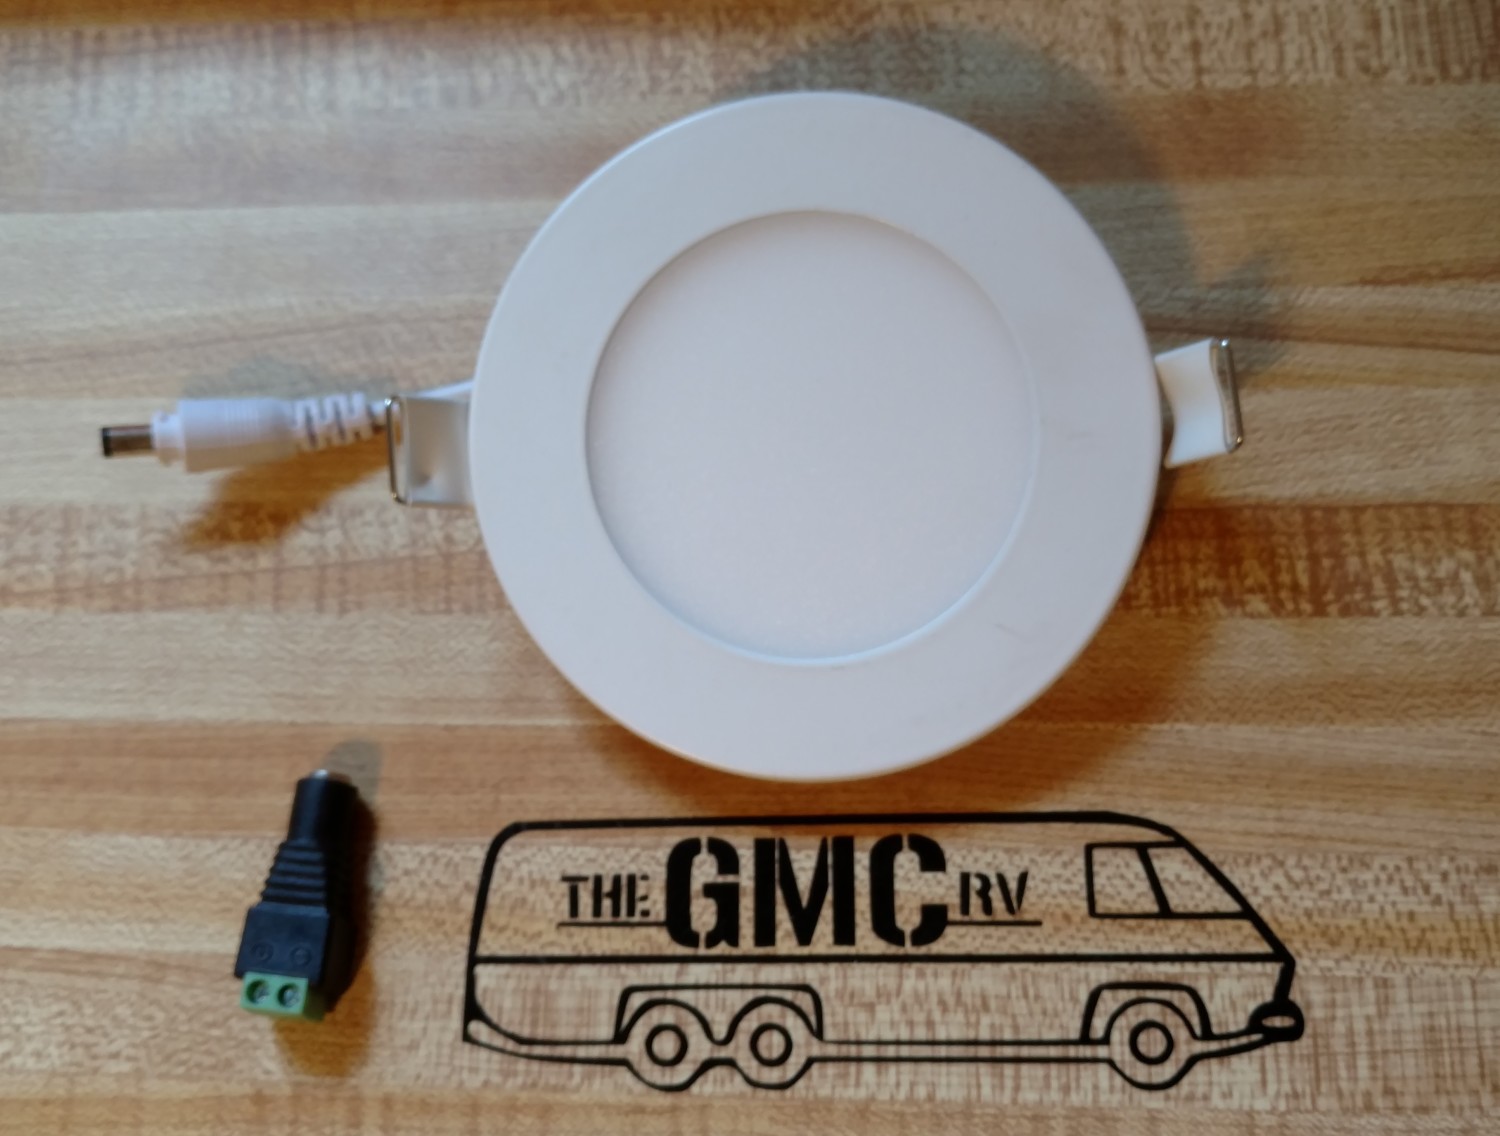
So what to do? Very early on in this process I started looking for lighting. I knew what I wanted It was just hard to find. When I finally came across it it was pricey, but perfect. While searching on Amazon I found 4W LED Panel Lights, the size was right (4.5″ wide, 1/2″ thick and flush mount) and they looked awesome. At 10 bucks a piece they weren’t cheap, but not too high either so I ordered a few.
The lights came in and the look, fit and feel was great! But the color was off. The ones I found had a 6500 Kelvin color temperature (which in laymen terms means they are that horrific surgical blue that all the assholes in civics put in their headlights to feel cool). At this point I contacted some of my sources in the Peoples Republic of China and found out who the best manufacturer of LED’s over there is. I contacted them and sure enough they make the amazon lights. We chatted a bit and I told them I wanted 3000 Kelvin color temp and they agreed and made up some samples and sent them over.
What a difference! 3000K in my opinion is perfect, they feel just right. Nice warm white-ish yellow light very similar to what you’re used to from an incandescent.
So I placed an order, minimum quantity put me in the LED business and we’ve been selling them ever since to many happy customers. (They are available in the store)
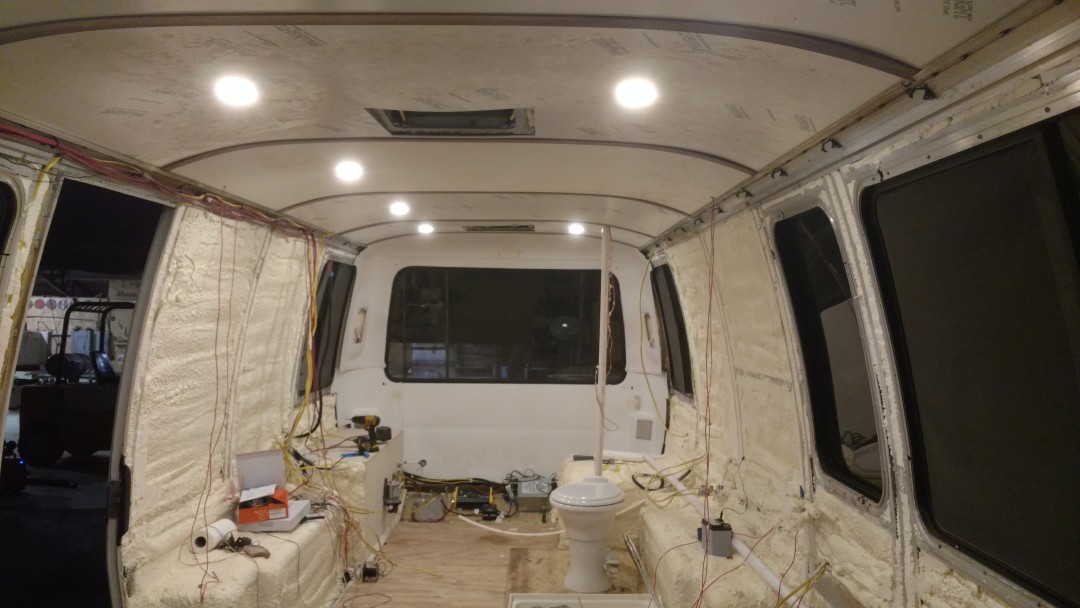
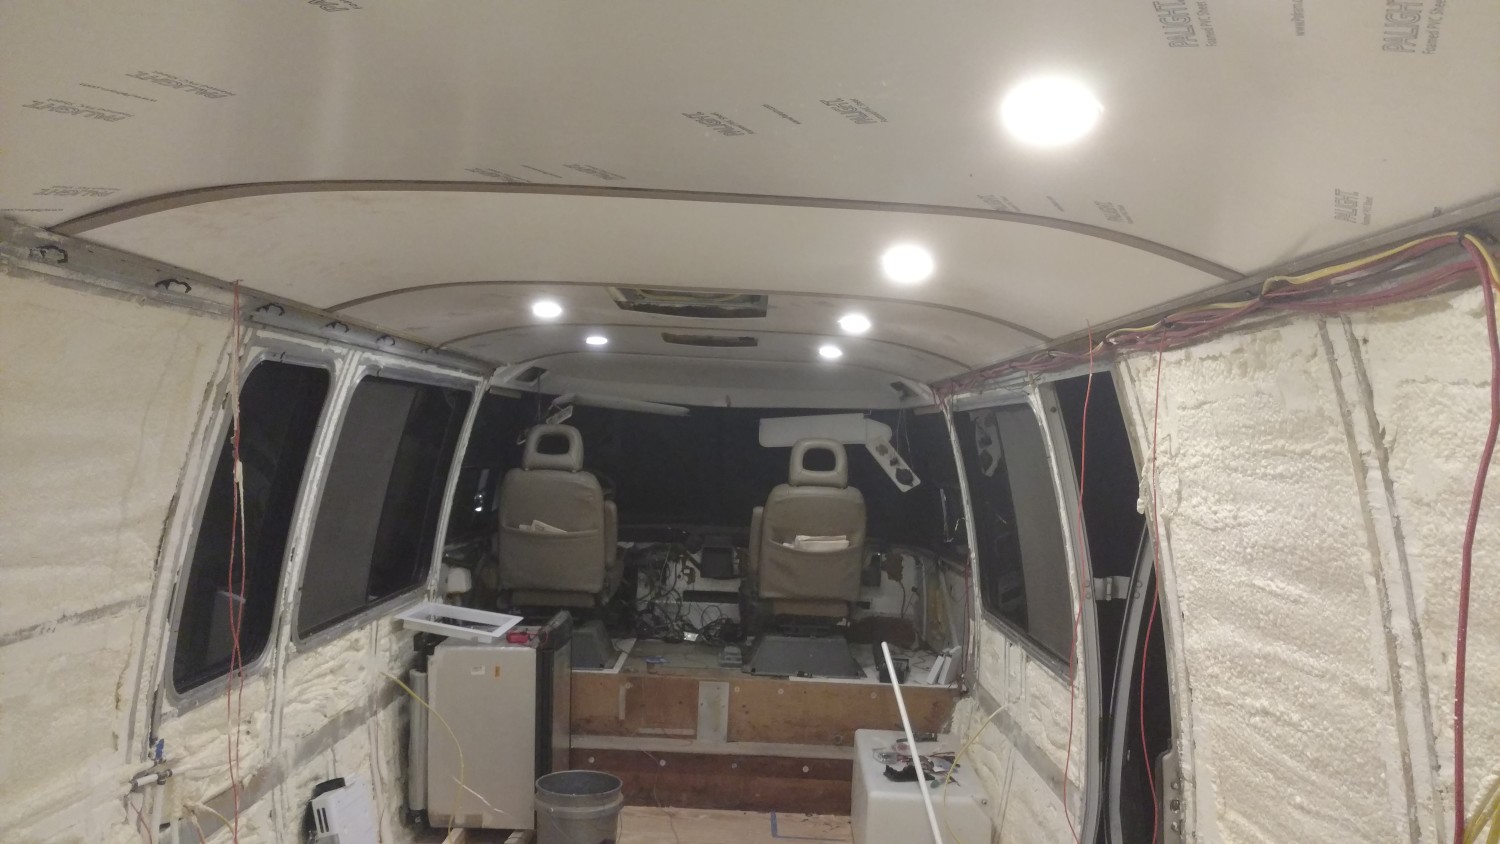
After getting our ceiling up (that will be a different post when it’s finished) We tackled the lighting install which is a very simple task with these LED’s.
They come with a 5.5mm x 2.1mm male plug as seen in the photo above. You can either cut this off and wire as you normally would (red to + black to -) or you can use an adapter to make them removable (also in the picture). We went with adapters because, well you never know. If one bites the dust its a simple 1 minute job to replace it this way. If using the screw on terminals the best way I have found is to strip your wires about 3/16 of an inch and twist the strands together. Unscrew the screw and push the wire into the appropriate slot (labeled) and screw it down tight. I recommend putting heat shrink over the whole shebang once you’re finished for a nice clean install.
We used a hole saw (3 5/8″) to drill the holes for the lights. Our wiring was run before we did the spray foam so it’s just hanging from the ceiling. Pop the lights in the holes and voila! Let there be light. During the day time we were not sure how it was going to work out, they didn’t look very bright so we thought maybe we would need to add more. When we came out after dark we were very pleasantly surprised! We have 8 lights installed (2 more to go in the bathroom when the walls are up) and the brightness is perfect. Not so bright to run you out, but plenty bright to work or make dinner or just relax. We are so pleased with the outcome!

These photos haven’t been altered at all that’s exactly what it looks like in the coach. There’s not quite as much glare in person but hey it’s a cell phone camera.
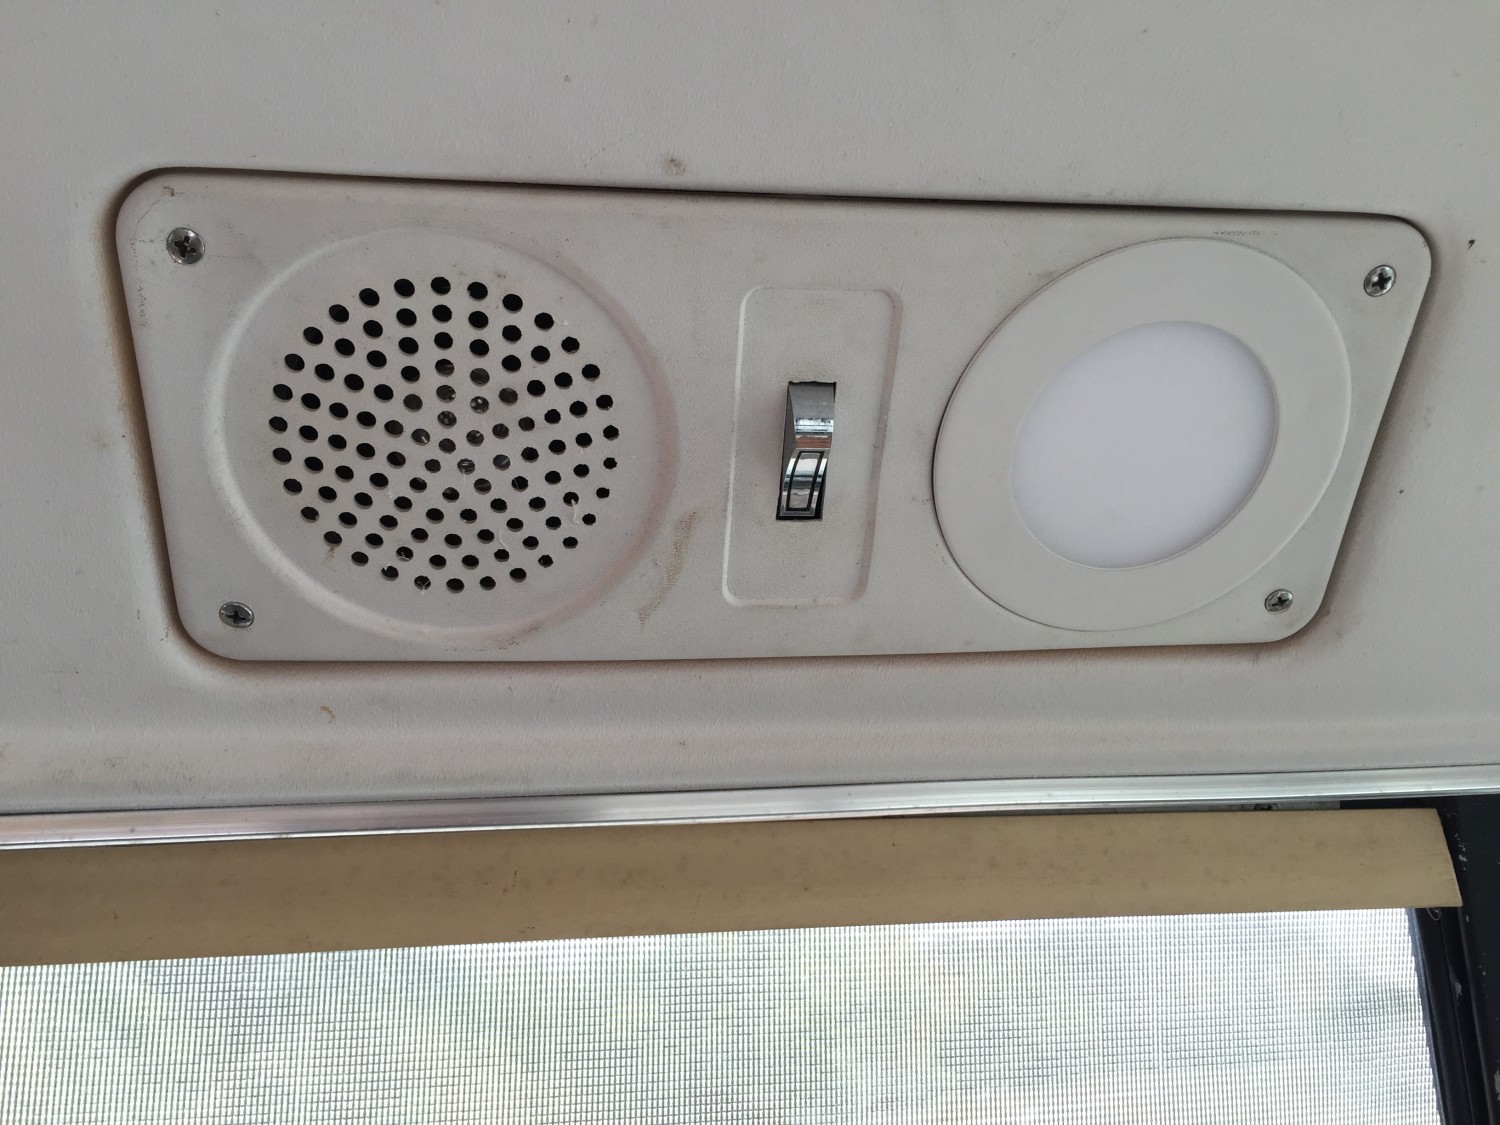
They also adapt perfectly to those ugly bulbous stock lights in the driver area:
Now on to the really awesome part!
I hooked up the Victron Battery Monitor to see how we were doing on amp draw. One of the biggest upsides to converting to LED is the tiny power requirement for the amount of light coming out. We have a total of 8 lights on when these photos were taken.
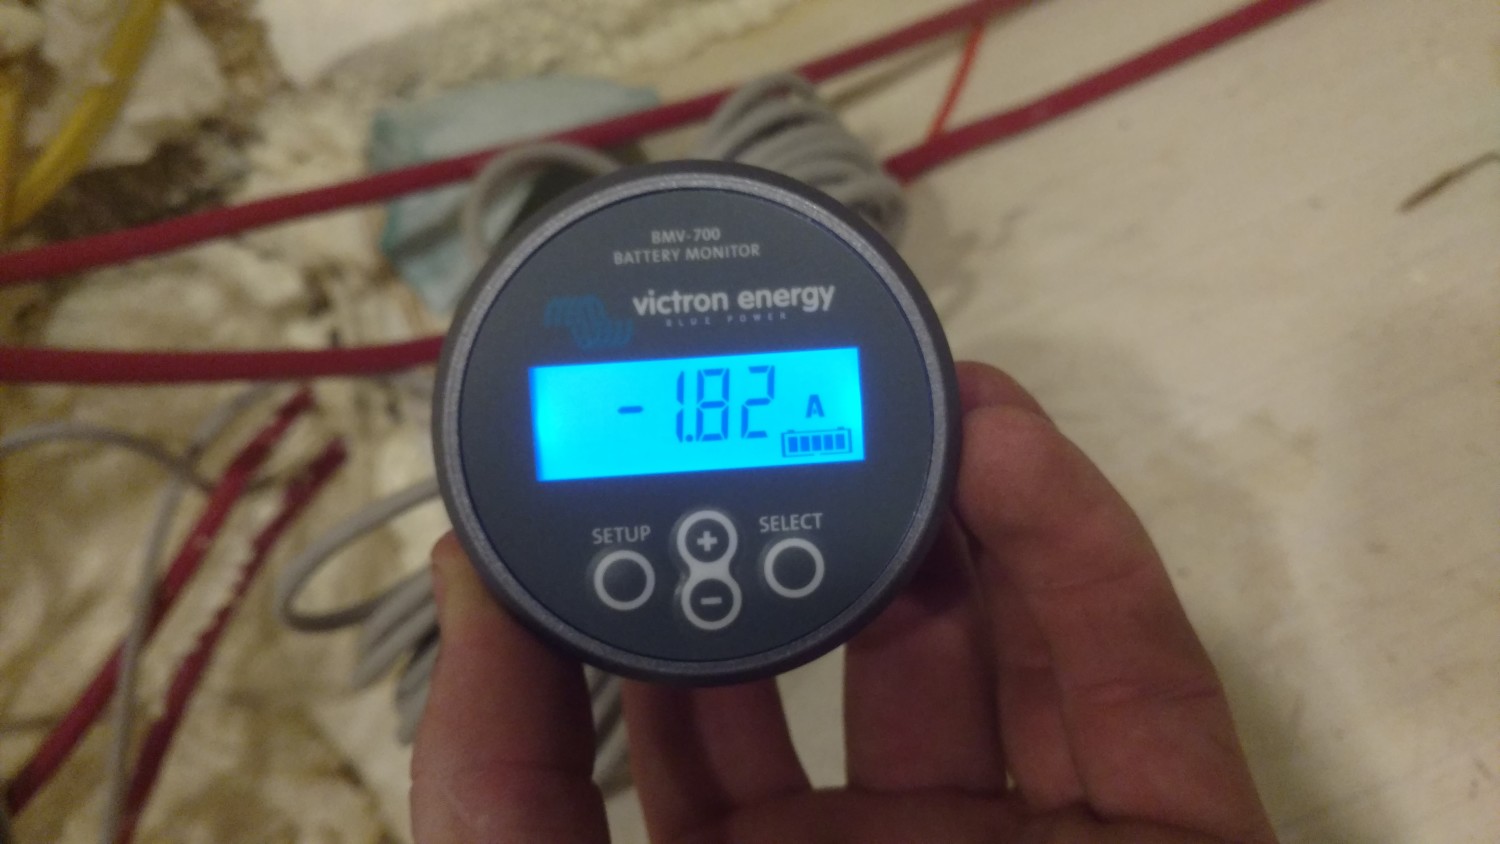
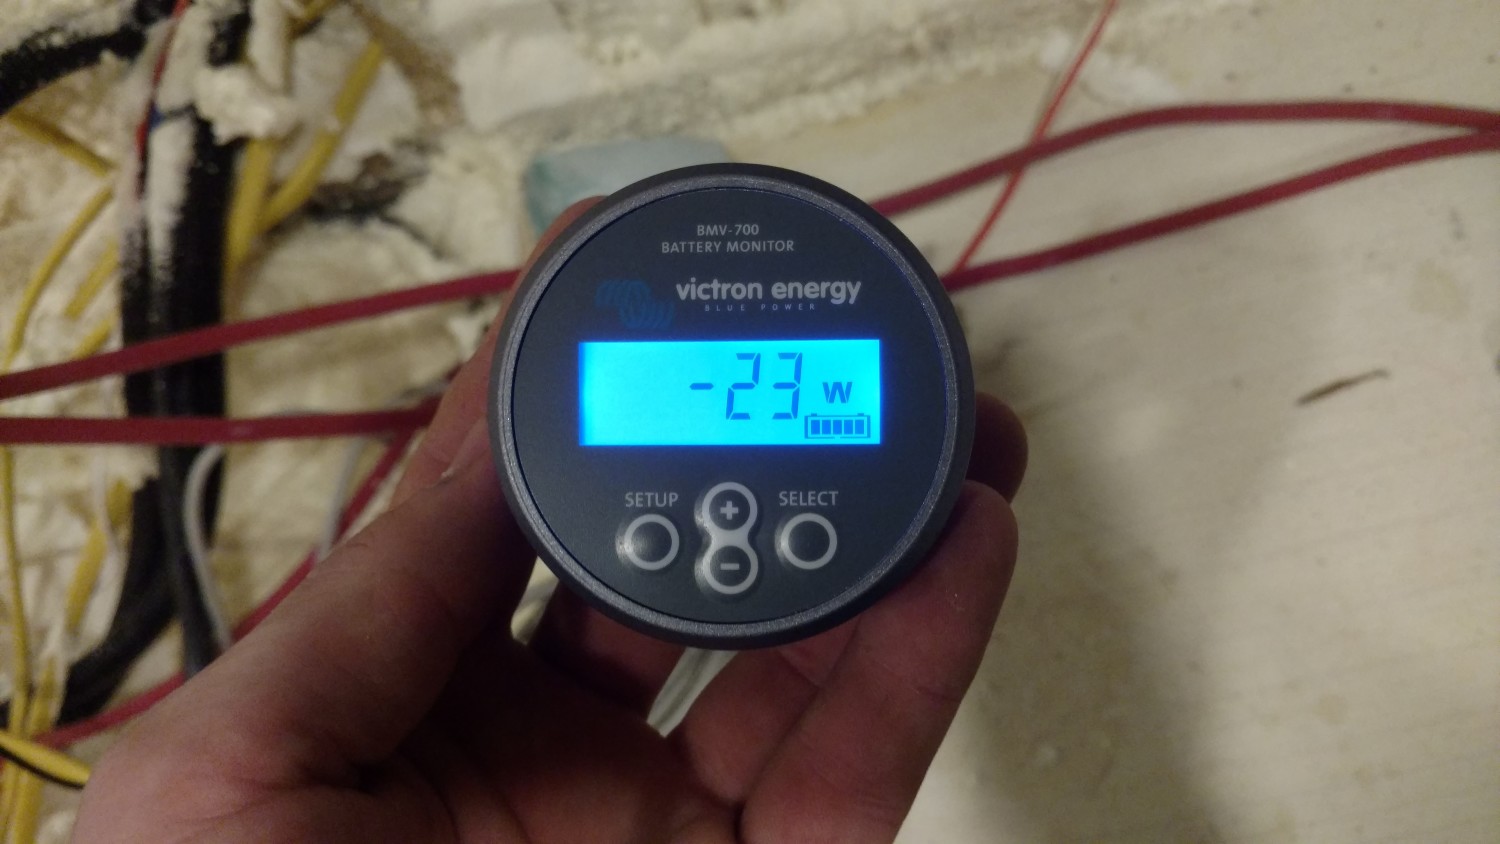
So the whole coach is lit up like an airport and we’re pulling a whopping 1.82 amps. That’s .2275 amps per light. Realistically we will never have more than 4 on at a time so our normal amp draw will be .91 amps or 11.5 Watts, or in laymens terms, nearly nothing.
For comparison the standard 1156 automotive bulb that your GMC has now is 21 watts…..each…….so this whole lighting system draws the same as if you have one of the tiny little lights on in your coach.
According to the battery monitor (which hasn’t been calibrated yet so I’m sure it’s wrong) we will get 90 hours of light at full blast before we drain the batteries to 50%. Not bad. Not bad at all.
UPDATE:
Last night just for fun, I left all the lights on and the stereo going all night just to see the effect on the house batteries. After 12 hours we are reading 93.7% charged! Man these things are efficient. It’s amazing me at every turn.
I just purchased some more of these light… But have not yet installed them… Is there a recommended dimmer? I plan to put some in the underside of my cabinets as reading lights?
Would this work:
https://www.amazon.com/dp/B00G7IRCCS/ref=wl_it_dp_o_pC_nS_ttl?_encoding=UTF8&colid=3V7ATUWQ9JDN6&coliid=I1P3CG4N2T91M3
Also, when wiring a string of these together to be controlled by a single switch, what is the proper wiring method? Red/red and black to black and then jumper to switch? Or? Obviously wiring isn’t my strong suit…
Thanks for the help..
Steve
Steve, They will ship out today!
Correct on the wiring, parallel all the + together and all the – together to the frame.
For the dimmer any 12-24V PWM dimmer will work, I think the one in your link would work (other than the awful reviews) but It doesn’t say PWM so I would check with the seller first.
Hi guys, I made a post to the GMC tribal Blog showing these Confimred PWM switches. I received 10 and they are marvelous.
http://www.artcilux.com/news437.html
To install just drill a 11mm hole and push into place. They are backlit with a subtle blue light and can be seen anytime, day or night, eh. Hope this helps you both!
I dig this switch, Tom. Thanks for sharing.
Could someone post a link to the “GMC Tribal Blog” that Tom mentions? I am a newbie…a wannabe really.
Please tell what your ceiling material used.many thanks.
We ended up using Aluminum sheets for the ceiling.
Did you put together a post on the ceiling renovation and replacement? If so where can I find it?